For large-scale property managers overseeing hundreds or thousands of units, every vacant day represents significant lost revenue. Reducing Days on Market (DOM) is not just a goal; it's a critical financial lever. High-quality, consistent photography is the first and most crucial touchpoint in the leasing journey, directly impacting lead-to-tour conversion rates and the overall speed-to-lease.
According to Zillow, listings with professional photos get 61% more views. For enterprise portfolios, this translates directly to a wider top-of-funnel, faster lead generation, and a measurable reduction in vacancy costs. Implementing standardized, professional-level photography across a distributed portfolio creates a powerful, scalable marketing engine that elevates your brand and accelerates leasing.
This guide provides eight actionable real estate photography tips designed for scalability. These techniques will help your operations team create compelling visuals that attract qualified tenants, accelerate leasing cycles, and improve your cost-per-door efficiency. By mastering these fundamentals, you can ensure every listing, from a single-family home to a unit in a multifamily building, is presented to maximize its leasing potential and minimize revenue loss.
To further enhance your property marketing efforts and potentially slash days on market, consider incorporating aerial perspectives. For a comprehensive guide to real estate drone photography, which is becoming increasingly vital in property marketing, refer to this resource. The following tips will focus on the essential interior and exterior shots that form the foundation of any successful listing.
1. Use a Wide-Angle Lens (14-24mm)
In real estate photography, your lens choice directly impacts how a potential tenant perceives a property's space and value. A wide-angle lens is an indispensable tool, allowing you to capture a broader field of view than a standard lens. This is crucial for interior shots, as it enables you to showcase an entire room in a single frame, making spaces feel more expansive, open, and inviting. For property managers focused on reducing Days on Market (DOM), this visual impression can significantly accelerate lead-to-tour conversions by presenting a more compelling and comprehensive view of the unit online.
The sweet spot for most full-frame cameras is a focal length between 14mm and 24mm. This range is wide enough to capture small rooms like bathrooms or galley kitchens effectively, yet not so wide that it creates unnatural, distracting distortion that misrepresents the space. Industry leaders recognize this as a best practice; Zillow’s professional photography guidelines, for example, specify wide-angle requirements to ensure high-quality, effective listings.
How to Implement This Tip
To get the most out of your wide-angle lens, focus on technique. Shooting from a corner of the room is one of the most effective real estate photography tips for maximizing the visible space in your shot. Additionally, maintaining a perfectly level camera is critical.
Key Insight: Always keep your camera level and parallel to the walls. Tilting the camera up or down creates "keystoning," where vertical lines appear to converge, making the walls look slanted and unprofessional. Using a tripod with a built-in bubble level is the best way to prevent this distortion and maintain a high-quality visual standard across your portfolio.
For property managers with large portfolios, standardizing on a specific wide-angle lens (like a 16-35mm, popular with luxury firms) ensures consistency across all listings. This creates a uniform, professional look that strengthens your brand and sets clear expectations for prospective tenants. For ultimate control, advanced photographers use tilt-shift lenses to correct perspective issues in-camera, eliminating distortion entirely and delivering best-in-class results.
The following summary box highlights the primary benefits of using a wide-angle lens for your property listings.
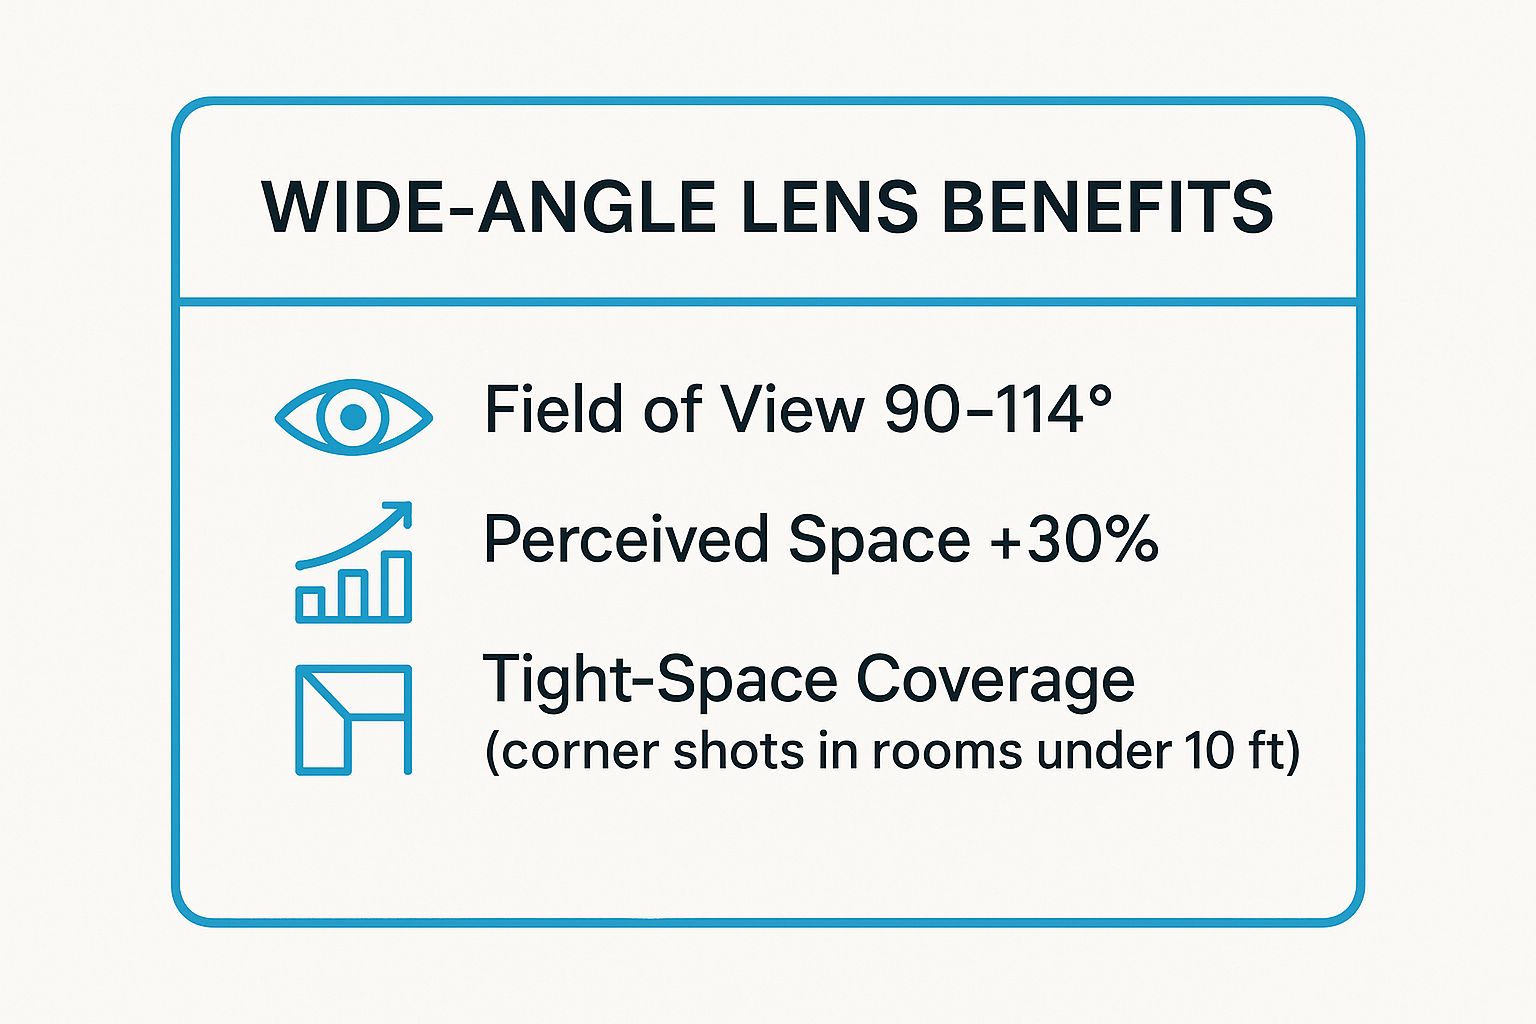
This data shows that a wide-angle lens can make a space feel up to 30% larger, a powerful tool for attracting tenants to smaller units or properties and increasing lead-to-tour conversion rates.
2. Master Natural Lighting and Golden Hour Timing
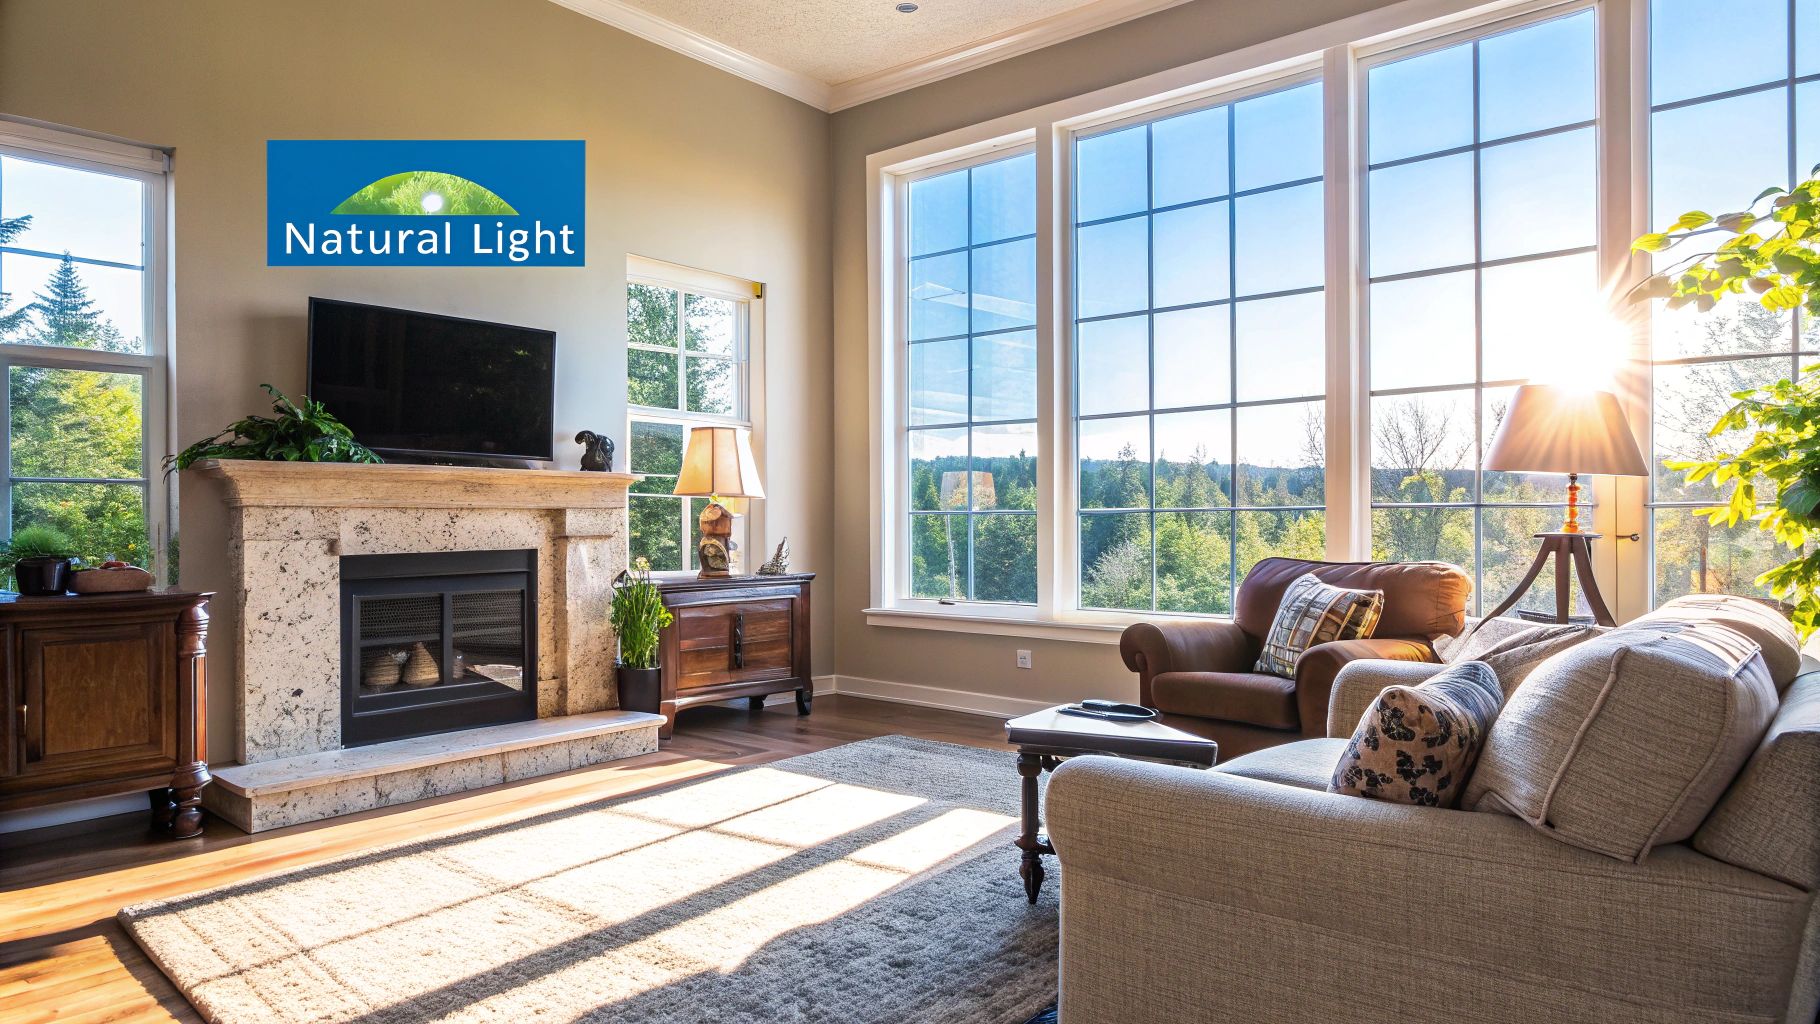
The quality of light in your photos is the single most important factor in creating an emotional connection with prospective tenants. Natural light makes a property feel authentic, bright, and welcoming, directly impacting a viewer's perception of its value. Strategic use of lighting, particularly during the "golden hour"—the first hour after sunrise and the last hour before sunset—can dramatically reduce Days on Market (DOM) by presenting your listings in their best possible light. This warm, soft illumination minimizes harsh shadows and enhances a property’s curb appeal, a technique consistently used in high-end listings.
For property managers with large, distributed portfolios, mastering lighting isn't just an artistic choice; it's a scalable operational strategy. High-quality, naturally lit photos attract more qualified leads and improve lead-to-tour conversion rates, as they set accurate and appealing expectations. Airbnb’s photography guidelines, for instance, heavily emphasize the use of natural light to create inviting spaces, a principle that directly translates to faster leasing in the long-term rental market.
How to Implement This Tip
Effectively using natural light requires planning and precise timing. For exterior shots, the golden hour is unmatched for creating a premium, desirable atmosphere that captures attention online. For interiors, the goal is bright, even lighting that makes rooms feel spacious and clean.
Start by scouting the property at different times of the day to understand how sunlight moves through the space. This allows you to schedule shoots for when key rooms, like the living area or primary bedroom, are filled with the most flattering light. Typically, scheduling interior shoots 2-3 hours after sunrise provides bright, indirect light that illuminates spaces without creating harsh, distracting glares or shadows.
Key Insight: Always open all blinds, shades, and curtains before you begin shooting interiors. Turn off all artificial lights (lamps, overhead fixtures) to avoid mixed color temperatures, which create a yellow or orange cast that looks unprofessional and is difficult to correct in post-processing. Relying solely on natural light from windows is a key process for maintaining quality at scale.
To further enhance interior lighting, use a simple white foam board as a reflector. Position it opposite a window to bounce light into darker corners of the room, creating a more balanced and professional-looking image. Standardizing this approach across your portfolio ensures every listing has a consistent, high-end feel, strengthening your brand and helping properties lease faster. This is one of the most cost-effective real estate photography tips for elevating your entire portfolio.
3. Stage and Declutter Every Space
Beyond camera settings and lenses, the environment you photograph is the single most important factor in creating compelling real estate images. Staging and decluttering transform a property from a personal residence into a neutral, aspirational product. The goal is to remove distractions and personal items, allowing prospective tenants to mentally move in and envision their own lives within the space. For property managers operating at scale, this step is not just cosmetic; it's a strategic move that directly impacts revenue by making units more desirable and reducing Days on Market (DOM).
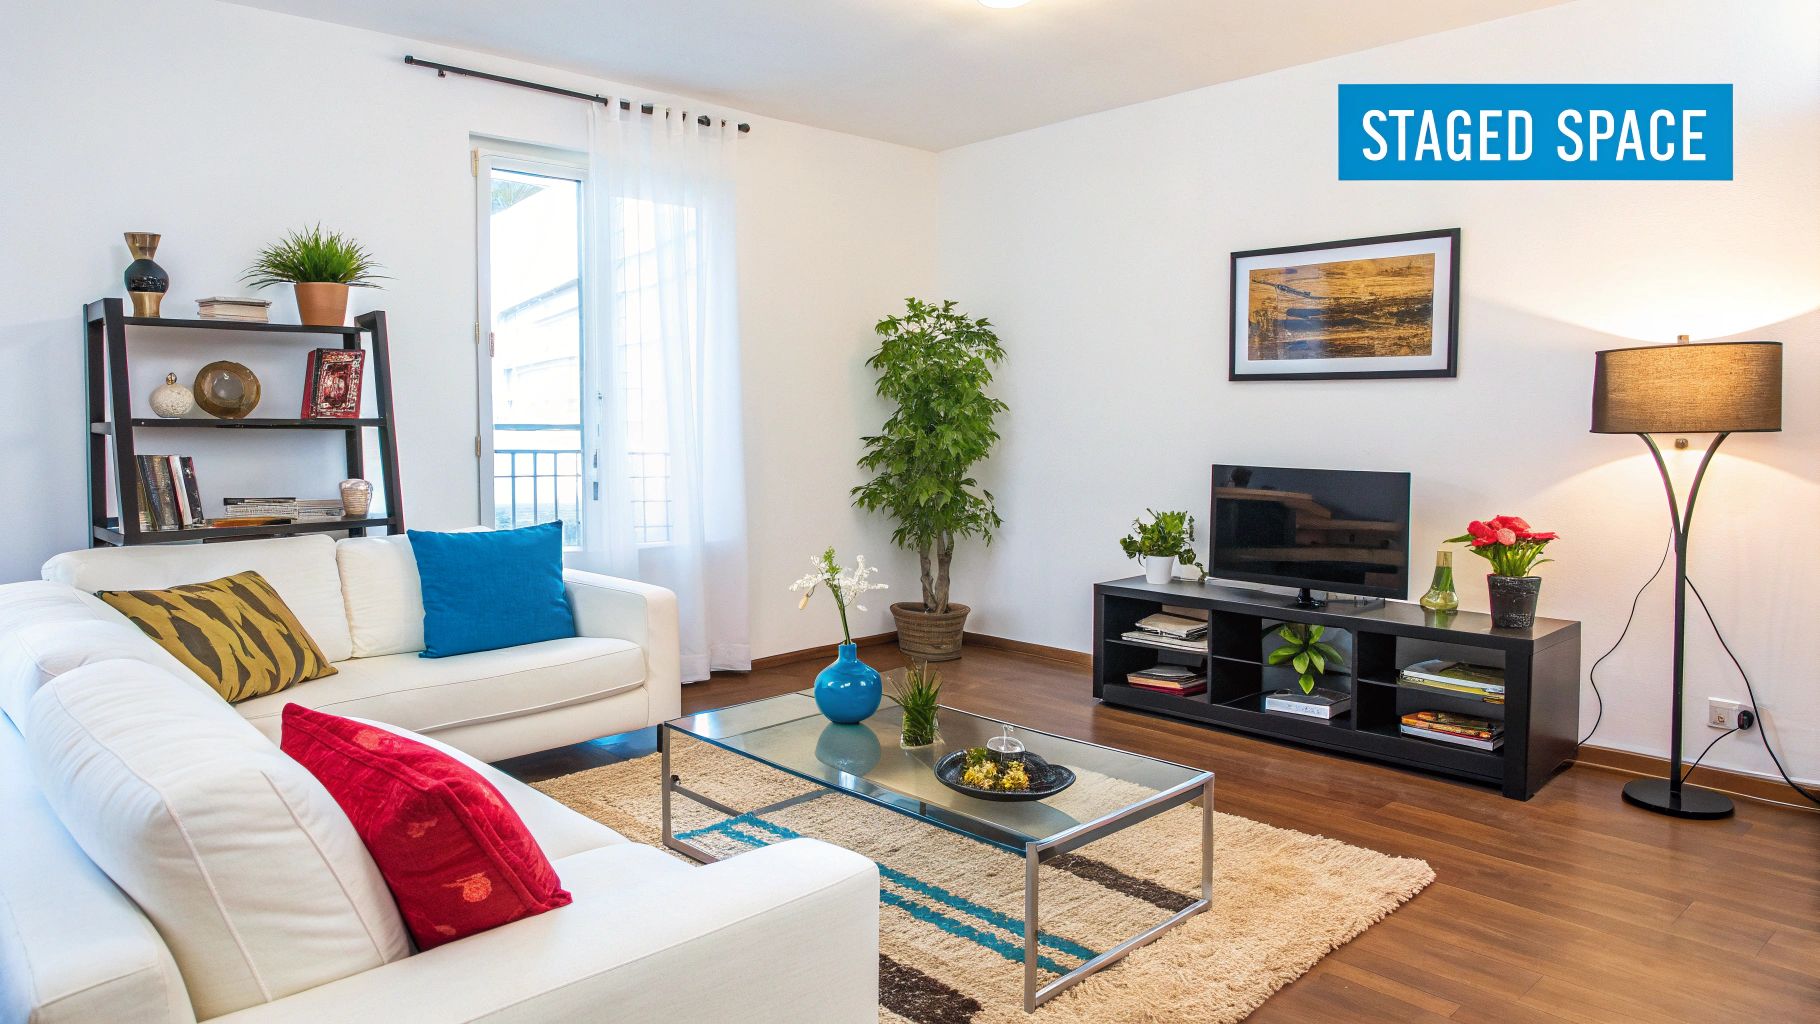
This process is a proven driver of financial returns. According to a 2023 report from the National Association of Realtors (NAR), 81% of buyers' agents said staging a home made it easier for a buyer to visualize the property as a future home. This sentiment translates directly to the rental market, where visualization accelerates the decision-making process and leads to quicker lease-ups. For property managers, this is one of the most effective real estate photography tips for creating a portfolio that stands out. Beyond just aesthetics, understanding the tangible benefits of decluttering your home can provide extra motivation.
How to Implement This Tip
Effective staging doesn't require a complete overhaul. The key is strategic subtraction followed by intentional addition. You can get more information on how to prepare your property for new tenants on showdigs.com.
Key Insight: Aim to remove at least 50% of the existing furniture and personal items in an occupied or furnished unit. This instantly creates a feeling of spaciousness, which is a major selling point in photos and a key driver of lead conversion. Less is always more when preparing for a shoot.
Follow this simple checklist for every property before photographing it:
- Declutter Surfaces: Remove all magnets, papers, and personal photos from the refrigerator. Clear kitchen and bathroom countertops of everything except a few select decorative items (e.g., a nice soap dispenser or a bowl of fruit).
- Neutralize Spaces: Pack away family photos, diplomas, and personal collections. The goal is to create a blank canvas that appeals to the widest possible audience.
- Enhance with Life: Add fresh flowers in a simple vase or a few healthy green plants to bring life and a pop of color into rooms.
- Perfect the Bedrooms: Ensure all beds are crisply made, preferably with neutral, hotel-style bedding. Add a couple of decorative pillows for a touch of elegance.
- Manage Cords and Wires: Hide or remove all visible electronic cords. This small detail makes a huge difference in professionalism and is easily standardized across a large portfolio.
4. Shoot from Corner Positions at Door Height
The camera's position within a room is as important as the lens you use. Shooting from a corner at approximately door height (around 5-6 feet) is a foundational technique in real estate photography that accomplishes several key objectives. This perspective provides the most comprehensive view of a room, showcasing its layout, depth, and connections to other spaces. For property managers, this method is critical for accurately representing square footage and helping prospective tenants visualize how they would live in the space, which can directly influence lead-to-tour conversion rates.
This approach mimics a natural, human-eye perspective, making the photos feel familiar and relatable. It avoids the disorienting, abstract angles that can come from shooting too low or too high. Major real estate brands like Sotheby's International Realty often have photography standards that specify corner positioning to ensure consistency and quality. Adopting this standard across a large portfolio ensures every listing is presented professionally, reducing Days on Market (DOM) by giving prospects a clear, appealing first impression.
How to Implement This Tip
Effectively using this technique requires more than just standing in a corner. A sturdy tripod is non-negotiable for achieving the correct height and stability. Start by extending your tripod to roughly door-handle or eye level, typically between 5 and 6 feet. Position it snugly into a corner to maximize the visible area of the room.
Key Insight: The goal is to show as much of the room's floor and dimensions as possible without introducing distortion. Including a doorway in the frame is a powerful compositional tool, as it demonstrates the property's flow and connects one room to another, giving a better sense of the overall floor plan and speeding up prospect qualification.
For property managers striving for operational excellence, standardizing camera height and positioning is a simple yet effective way to systematize quality control. Create a simple checklist for your field team or photographers:
- Tripod Height: Set to 5-6 feet.
- Position: Place in a corner, showing at least two walls.
- Framing: Include doorways to show connections between rooms.
- Leveling: Ensure the camera is perfectly parallel to the floor to avoid vertical lines converging (keystoning).
This systematic approach creates a uniform, high-quality visual experience across all your listings, strengthening your brand and accelerating the leasing process from lead to tour.
5. Use HDR (High Dynamic Range) Photography
High Dynamic Range (HDR) photography is a game-changing technique for creating professional, true-to-life property images. It addresses one of the most common challenges in interior photography: balancing the bright light from windows with the darker areas of a room. HDR works by capturing multiple images of the same scene at different exposure levels—a process called bracketing—and then merging them into a single, perfectly exposed photograph. This ensures that both the interior details and the exterior view through the window are crisp and clear, preventing blown-out highlights or murky shadows.
For property managers, this technique directly impacts lead quality by presenting a property exactly as it appears in person, building trust and accelerating the decision-making process for prospective tenants. This method is now a non-negotiable standard in high-end listings and a key process for any large-scale operation aiming for consistency. Leading platforms like Zillow recommend HDR to achieve the highest-quality visuals that drive engagement and reduce DOM.
How to Implement This Tip
Effectively using HDR requires precision and the right tools. The core of the technique is bracketing, which means taking a series of photos without moving the camera. A tripod is absolutely mandatory to ensure every shot is perfectly aligned, as even the slightest movement can ruin the final blended image. Shooting in RAW format is also critical, as it captures the maximum amount of image data, giving you far more flexibility during the editing process than a standard JPEG file.
Key Insight: The goal of HDR in real estate is a natural, balanced look, not an over-processed, surreal image. Bracket your shots in 2-stop intervals (e.g., -2, 0, +2) and use a subtle touch when blending them in software like Adobe Lightroom or Photomatix Pro. The final image should look clean and realistic, not artificial, to build trust with prospects.
For property management companies overseeing large portfolios, standardizing an HDR workflow is key to maintaining a consistent, high-quality brand image across all listings. This process ensures every unit, from a compact studio to a large single-family home, is showcased in its best possible light. This level of quality and consistency can significantly improve lead-to-tour conversion rates and reduce Days on Market (DOM).
6. Capture Twilight 'Blue Hour' Exterior Shots
To make a property stand out in a crowded market and command a premium perception, few techniques are as powerful as twilight photography. Often called the "blue hour," this brief window occurs approximately 20-30 minutes after sunset when the sky transitions to a deep, rich blue. This creates a stunning contrast with the warm, inviting glow from a property's interior and exterior lights. For property managers, these dramatic, high-end images can significantly elevate a listing's appeal, justify higher rental rates, and drastically reduce Days on Market (DOM) by capturing immediate attention.
This professional technique is a standard for luxury listings because it conveys a sense of elegance, warmth, and security that daytime shots cannot replicate. High-end brands like Christie's International Real Estate consistently leverage twilight exteriors to create an emotional connection with viewers. This approach frames the property not just as a structure, but as a welcoming home, a key differentiator in a competitive rental landscape that directly impacts lead conversion.
How to Implement This Tip
Executing a successful twilight shoot requires precise timing and preparation. Arrive at the property at least an hour before sunset to scout locations, set up your tripod, and finalize your compositions. Before the light begins to fade, turn on every light in the house—interior lamps, chandeliers, porch lights, and landscape lighting. The goal is a warm, golden glow spilling from the windows. For stunning exterior photos, especially during the 'blue hour', ensuring outdoor features are impeccable is key; learn how to enhance curb appeal by restoring limestone patio stones.
Key Insight: Use your camera's manual mode and shoot bracketed exposures (one normal, one overexposed, one underexposed). This HDR (High Dynamic Range) technique allows you to blend the images in post-processing, perfectly capturing the deep blue sky, the bright interior lights, and the darker landscape details in one flawless photograph.
For property managers with large-scale portfolios, scheduling a dedicated twilight shoot for premium or hard-to-lease properties can provide a significant ROI. These standout hero images are perfect for online listing portals, social media marketing, and digital ad campaigns. The investment in time and skill produces an asset that accelerates lead generation and solidifies a premium brand image, ultimately lowering cost-per-door and reducing vacancy loss.
7. Include Lifestyle and Detail Shots
While wide-angle shots are essential for conveying space, lifestyle and detail shots are what sell the experience of living in a property. These images move beyond standard room documentation to tell a story, helping prospective tenants envision themselves in the home. For property managers, this is a powerful tool to differentiate a listing, justify a premium rent, and reduce Days on Market (DOM) by creating an emotional connection with high-quality leads.
Focusing on unique features, high-end finishes, and desirable amenities helps a property stand out in a crowded market. Leading real estate brands have mastered this; Sotheby's International, for instance, often dedicates 15-20% of a luxury listing's photo gallery to these evocative shots. Similarly, Airbnb's photography guidelines heavily emphasize capturing lifestyle moments and amenity details to drive bookings. This approach transforms a simple rental listing into a compelling marketing asset that accelerates the lead-to-tour conversion funnel.
How to Implement This Tip
To effectively integrate this into your real estate photography tips, shift your focus from just capturing rooms to capturing moments and features. Think like a magazine editor, highlighting the elements that make the property unique and desirable.
- Capture Unique Architectural Elements: Photograph custom built-ins, a fireplace mantle, unique light fixtures, or elegant crown molding.
- Showcase High-End Finishes: Use a macro lens or a close-up shot to highlight granite countertops, designer tile backsplashes, or brand-name appliances.
- Highlight Outdoor Living: Feature patios, decks, landscaped gardens, or a community pool. Stage these areas with outdoor furniture or a fire pit to show how the space can be used.
- Feature Luxury Amenities: If the property has a wine cellar, home gym, or media room, these are major selling points that deserve their own dedicated photos.
Key Insight: The goal of a lifestyle shot is to sell a dream, not just a floor plan. A close-up of a high-end faucet suggests quality, a shot of a sun-drenched reading nook suggests comfort, and a photo of a pristine community pool suggests a premium living experience. This helps pre-qualify leads looking for higher-end units.
For property managers with large portfolios, creating a shot list that includes a standard number of detail and lifestyle photos ensures consistency and quality across all marketing materials. This elevates your brand and helps attract tenants who appreciate and are willing to pay for quality. These specialized shots are a critical component of a comprehensive visual marketing strategy that drives faster conversions from lead to lease.
8. Maintain Vertical Lines and Proper Perspective
One of the most defining characteristics of professional real estate photography is the treatment of perspective, specifically ensuring all vertical lines in an image are perfectly straight. When vertical elements like walls, doorframes, and window casings appear to lean or converge, it creates a distorted, amateurish look that can subconsciously erode a potential tenant's trust. For property managers operating at scale, maintaining this standard across a large portfolio communicates a high level of professionalism and attention to detail, directly impacting brand perception and the perceived quality of the rental units.
This principle is a non-negotiable standard in high-end architectural and design publications. Adhering to this rule ensures that a property is represented accurately and professionally, which is crucial for reducing Days on Market (DOM) by attracting serious, qualified leads who are confident in the listing's integrity.
How to Implement This Tip
Achieving straight vertical lines requires a combination of in-camera technique and post-processing. The primary goal is to keep the camera sensor perfectly parallel to the subject's vertical plane.
Key Insight: The moment you tilt your camera up or down, you introduce perspective distortion known as "keystoning," causing vertical lines to slant. Always prioritize shooting from a tripod at chest or waist height (approximately 4-5 feet) and keeping the camera perfectly level. This is a simple, repeatable process that ensures quality at scale.
For property management companies aiming for systemized, high-quality results across hundreds or thousands of units, mastering this is key.
- Use In-Camera Guides: Activate your camera’s built-in bubble level or electronic grid overlay. Aligning the dominant vertical lines of the room (e.g., a doorframe or corner) with the grid lines is the most effective way to ensure a straight shot.
- Shoot Wider and Correct in Post: If you must capture a tall feature, shoot slightly wider than necessary while keeping the camera level. This gives you extra room to crop and use perspective correction tools in software like Adobe Lightroom or Photoshop without losing important parts of the image.
- Leverage Lens Correction Profiles: Modern editing software includes lens profiles that automatically correct for the barrel distortion common in wide-angle lenses. Applying this simple fix instantly improves the straightness of lines throughout the frame.
- Consider Tilt-Shift Lenses: For flagship properties or critical architectural work, a tilt-shift lens allows photographers to adjust the lens's position relative to the sensor, correcting perspective in-camera for unparalleled precision. This is the gold standard for architectural photography professionals.
Top 8 Real Estate Photography Tips Comparison
Automate Your Leasing Funnel to Maximize ROI
Mastering the real estate photography tips outlined in this guide represents a critical first step in optimizing your leasing pipeline. From leveraging a wide-angle lens and shooting during the golden hour to meticulously staging each room and correcting for vertical perspective, each technique contributes to a single, powerful outcome: creating listings that stop prospective tenants in their tracks. These are not merely aesthetic suggestions; they are strategic tools designed to generate high-quality leads and directly reduce vacancy loss across your portfolio.
The goal of exceptional photography is to create an immediate emotional connection that drives a prospective tenant to take the next step. A perfectly captured twilight exterior or a beautifully lit living space can be the deciding factor that converts a passive browser into an active lead. By consistently applying these principles across your entire portfolio, you create a brand standard of excellence that builds trust and accelerates interest, directly impacting your lead volume and quality.
From Stunning Photos to Signed Leases: The Scalability Challenge
However, for enterprise-level property managers overseeing hundreds or thousands of units, brilliant photography is only half the battle. The true measure of success isn’t just generating leads; it's converting them into signed leases with maximum efficiency. This is where operational bottlenecks can completely undermine your marketing investment. A lead's interest peaks the moment they see your photos. If your response and tour scheduling process is slow, that interest evaporates.
Consider the financial implications. For a portfolio with a $1,800/month average rent, every vacant day costs you $60 per unit. Across 1,000 units with a 5% vacancy rate, that's a revenue loss of $3,000 per day. The speed at which you can move a lead from initial interest to a scheduled tour is directly correlated with your Days on Market (DOM) and overall profitability. Relying on manual coordination for showings across a distributed portfolio is simply not scalable.
Key Insight: Industry data consistently shows that the first agent to respond wins the lead. A delay of just 30 minutes can cause lead conversion rates to plummet. For large portfolios, this means an automated, immediate response system isn't a luxury; it's a financial necessity for minimizing vacancy loss and maximizing portfolio revenue.
Actionable Next Steps: Bridge the Gap Between Marketing and Operations
To translate your investment in high-quality real estate photography into measurable ROI, you must build an equally sophisticated operational backend. Your next steps should focus on closing the gap between lead generation and lease signing.
- Audit Your Current Lead-to-Tour Process: Map out every step from the moment a lead comes in. Identify the exact time it takes to first respond, qualify the prospect, and schedule a tour. This will reveal your biggest bottlenecks.
- Calculate Your Vacancy Cost: Determine the daily cost of a vacant unit across your portfolio. This powerful metric (Daily Revenue per Unit x Number of Vacant Units) frames the urgency of reducing your DOM.
- Implement an Automated Scheduling System: Your stunning photos generate interest 24/7. Your leasing operations must be able to capture and convert that interest instantly with a platform like Showdigs, which provides an AI-powered scheduler to book tours on-demand.
- Standardize Your Showing Process: Ensure every prospect receives the same high-quality, professional experience, regardless of which property they tour or who shows it. This is crucial for brand consistency and quality control at scale.
By implementing these advanced real estate photography tips, you are building the foundation for a powerful marketing engine. But to truly capitalize on its potential, you must connect that engine to a high-speed, automated leasing funnel. This integration is what separates market leaders from the rest, transforming beautiful images into a streamlined system that consistently reduces DOM, boosts lead-to-tour conversion rates, and maximizes portfolio revenue.
Don't let high-quality leads wither on the vine due to operational delays. Showdigs provides the enterprise-grade leasing automation platform to instantly convert interest generated by your photos into scheduled tours. By combining an AI-powered scheduler with an on-demand network of licensed agents, we help you reduce DOM and maximize revenue across your entire portfolio.


