

For property managers overseeing hundreds or thousands of units, the move-out inspection is a critical financial control point, not just a procedural formality. A single missed damage item, multiplied across a portfolio, can erode profitability. An inefficient inspection process directly increases Days on Market (DOM), a metric that has a tangible impact on your bottom line. Every day a unit sits vacant costs you revenue; for a property renting at $2,000 per month, that's over $67 per day lost. This comprehensive move out inspection checklist is designed for scale.
This guide moves beyond simple line items to provide a framework for standardizing inspections across distributed portfolios, minimizing disputes, and accelerating the make-ready process. The goal is to create a repeatable system that protects your assets and accelerates your turn time, directly impacting your portfolio's financial performance. According to the National Apartment Association, the average turnover cost can range from $1,000 to $5,000 per unit, a significant portion of which is tied to the efficiency of the turn process initiated by the move-out inspection.
By systemizing this crucial step, you can significantly reduce DOM, protect your assets, and improve cost per door efficiency. In the following sections, we will break down every critical area of the property, from interior finishes and major systems to exterior components and documentation protocols, providing an actionable framework to ensure nothing is overlooked. This structured approach helps ensure consistency whether you manage 100 doors or 10,000.
1. Walls, Ceilings, and Paint Condition
The condition of walls, ceilings, and paint is arguably the most scrutinized and dispute-prone area of any move-out inspection. For property managers operating at scale, standardizing this assessment is critical for reducing turnover costs and minimizing security deposit conflicts. This part of your move out inspection checklist involves a meticulous review of all vertical and overhead surfaces for any deviations from their move-in state, beyond what is legally considered "normal wear and tear."
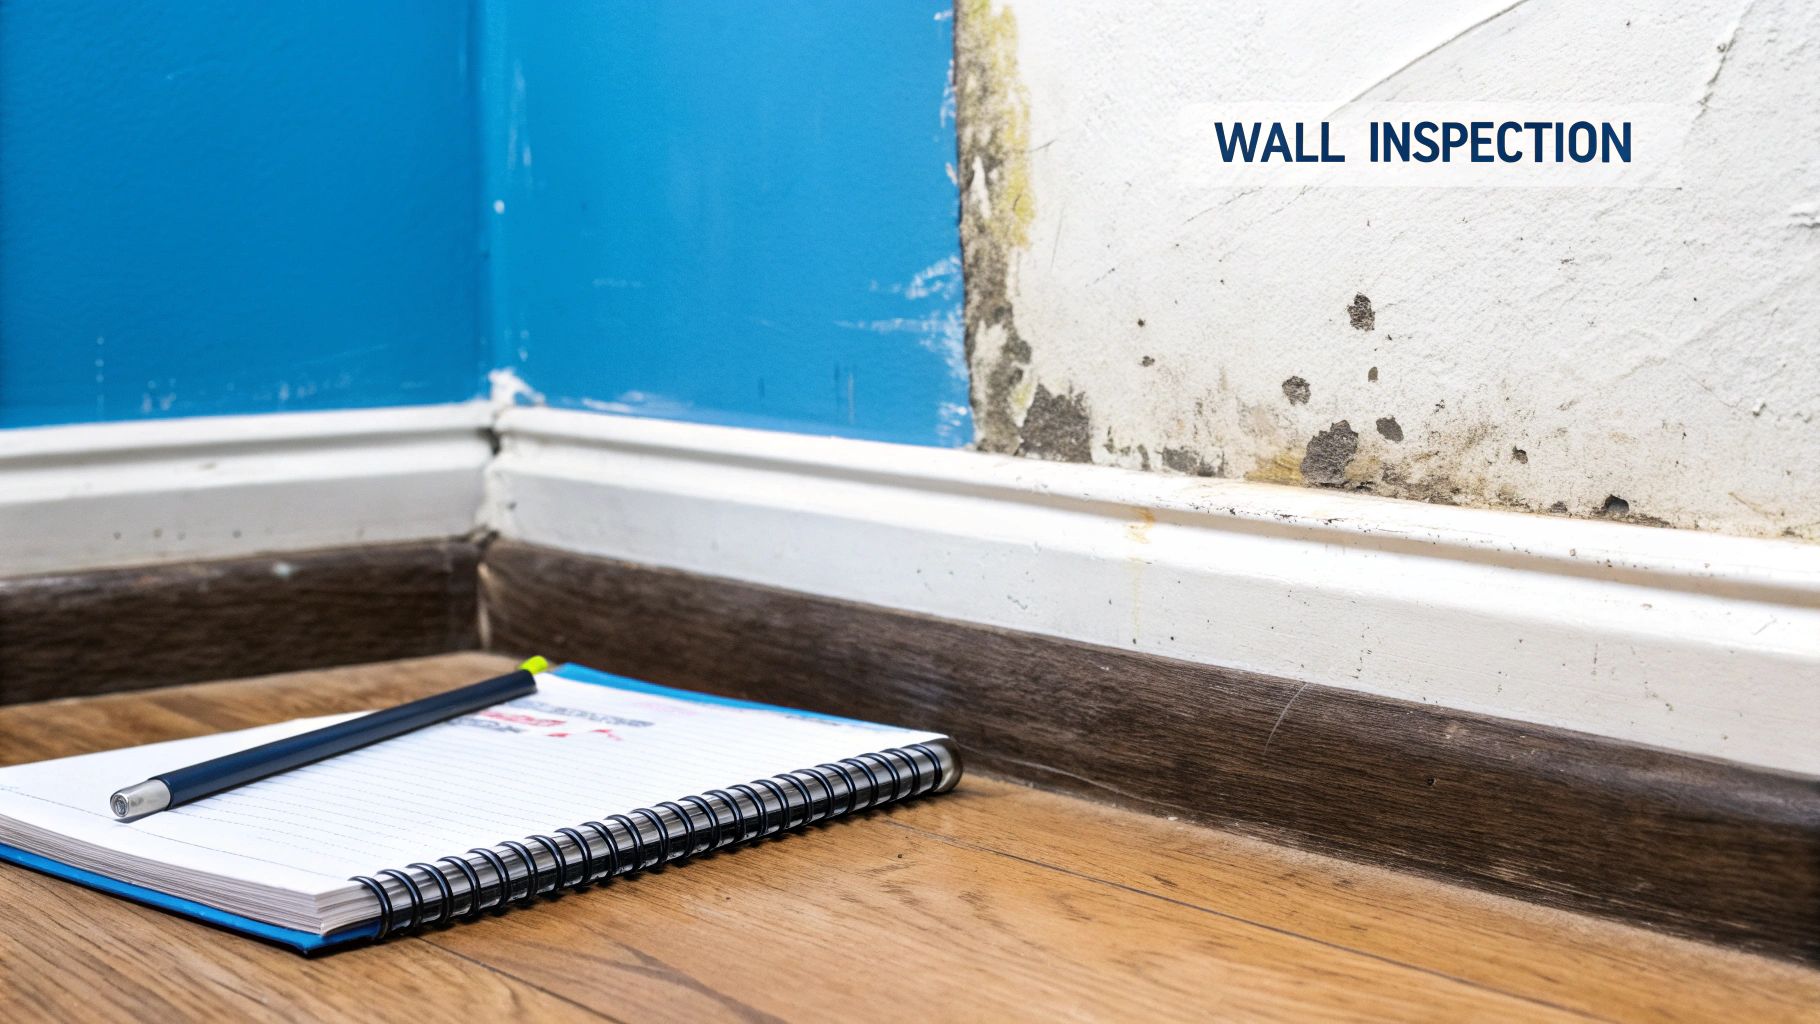
The primary goal is to identify and document tenant-caused damages that require more than a simple touch-up. This is where meticulous documentation becomes a property manager's best defense against disputes. Detailed, time-stamped photographic evidence and consistent evaluation criteria are non-negotiable. With precise, irrefutable records, you can confidently justify charges for repairs and protect the owner's investment. To learn more about how detailed reports can streamline this process, you can explore the benefits of comprehensive condition reports on Showdigs.com.
Distinguishing Damage from Wear and Tear
Success hinges on your ability to differentiate between acceptable, minor imperfections and chargeable damage. Clear, portfolio-wide standards are essential.
- Normal Wear and Tear (Not Chargeable): This includes minor scuffs from furniture, a few small nail holes for hanging pictures, and faint discoloration in high-traffic areas. Faded paint due to sunlight over several years also falls into this category.
- Example 1: Large holes (e.g., greater than a quarter-inch) left from a wall-mounted TV or shelving units that require patching, texturing, and repainting.
- Example 2: Extensive crayon, marker, or ink marks on walls that cannot be cleaned and necessitate priming and a full repaint of the affected wall or room.
- Example 3: An excessive number of nail or screw holes concentrated in one area, creating a "swiss cheese" effect that goes beyond reasonable use for decor.
- Example 4: Deep gouges or scratches in the drywall, peeling paint caused by tenant-applied decals, or any signs of unreported water damage like stains or bubbling on walls or ceilings.
2. Flooring and Carpet Assessment
After walls and ceilings, the condition of the flooring is a major focus of any move-out inspection and a frequent source of security deposit deductions. For property managers overseeing large, distributed portfolios, a systematic and fair approach to evaluating carpets, hardwood, tile, and vinyl is essential for maintaining asset value and ensuring tenant compliance. This part of your move out inspection checklist requires a detailed eye for issues that go beyond the expected scuffs and wear from daily life.
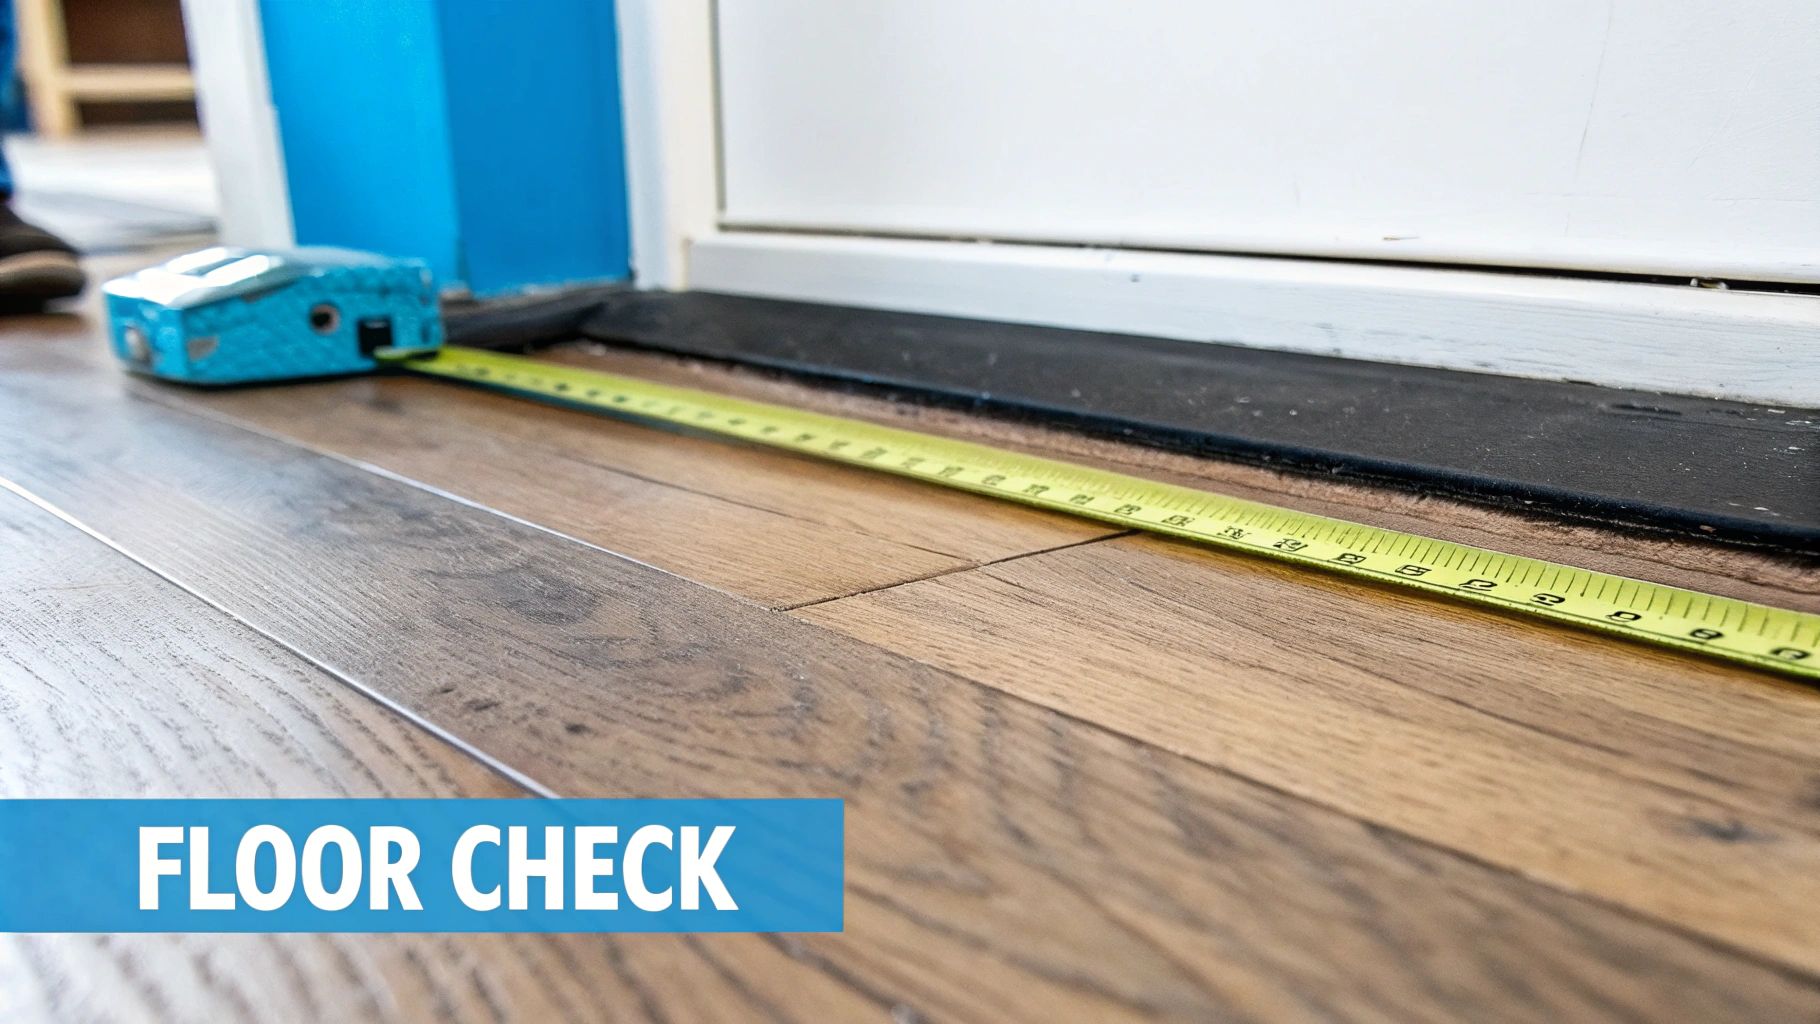
The objective is to accurately document any tenant-caused damage that necessitates repair or replacement, distinguishing it from the natural aging of the material. Carpets, in particular, can be a high-cost turnover item, making precise documentation and consistent evaluation standards critical. A well-documented assessment protects the property owner from absorbing costs for damages while providing clear, defensible evidence to the tenant, thereby reducing disputes and streamlining the turn process.
Distinguishing Damage from Wear and Tear
Your team's ability to differentiate between normal depreciation and negligence is key to fair and efficient operations. Implementing clear, portfolio-wide guidelines ensures every inspection is consistent.
- Normal Wear and Tear (Not Chargeable): This includes minor scuffing on hardwood or laminate, faint traffic patterns in carpets, and minor grout discoloration in tile floors. The prorated life of the flooring is also a critical factor; for example, a seven-year-old carpet will not be expected to be in pristine condition.
- Example 1: Deep, pervasive pet urine stains and odors embedded in the carpet and pad, which are often revealed by a blacklight and require professional enzymatic treatment or full replacement.
- Example 2: Distinct burn marks from cigarettes, candles, or dropped items on carpet or vinyl flooring that require patching or replacement of a section.
- Example 3: Deep scratches or gouges in hardwood or laminate flooring that go through the protective finish and require sanding, refinishing, or plank replacement.
- Example 4: Chipped or cracked tiles in the kitchen or bathroom, often caused by dropping a heavy object, which necessitates the replacement of individual tiles.
3. Kitchen Appliances and Fixtures
The kitchen is often the heart of a rental property, and its condition is a major factor in tenant satisfaction and attracting future occupants. For property managers handling large-scale portfolios, a systematic inspection of kitchen appliances and fixtures is crucial for identifying maintenance needs, assessing tenant-caused damage, and ensuring a smooth turn process. This part of your move out inspection checklist requires a hands-on evaluation of every component, from the refrigerator's temperature settings to the alignment of cabinet doors.

The primary objective is to verify both the cleanliness and the functionality of all kitchen elements. Neglected appliances can lead to costly repairs and create significant delays in re-leasing a unit, directly impacting revenue through increased vacancy days. By meticulously documenting the kitchen's state against the move-in report, you create a clear, defensible record that justifies any necessary deductions from the security deposit for excessive cleaning or repairs, thereby protecting the owner's investment and upholding portfolio standards.
Distinguishing Damage from Wear and Tear
Properly categorizing kitchen issues is vital for fair and efficient security deposit settlements. Clear guidelines help property managers consistently apply charges across their portfolio.
- Normal Wear and Tear (Not Chargeable): This includes minor surface scratches on stainless steel appliances, small scuffs on cabinet faces from regular use, or a worn-out drip pan on an electric stove. Minor, non-permanent water spots around the faucet base are also typically considered wear and tear.
- Example 1: A refrigerator that fails to maintain a safe temperature because the coils were never cleaned, leading to food spoilage and potential component failure.
- Example 2: An oven with a thick, baked-on layer of grease and food residue that poses a fire hazard and requires professional, heavy-duty cleaning services.
- Example 3: Broken or misaligned cabinet doors and drawers caused by excessive force, loose or stripped hinges from neglect, or damage from unauthorized hardware changes.
- Example 4: Permanent stains, burn marks, or deep cuts on countertops from placing hot pans directly on the surface or using it as a cutting board. Similarly, a chipped sink or a broken faucet handle falls under chargeable damage.
4. Bathroom Condition and Fixtures
Due to constant moisture and high usage, bathrooms are prime locations for wear, tear, and hidden damage that can lead to expensive repairs if missed. For property managers overseeing large portfolios, a systematic and detailed bathroom assessment is a non-negotiable part of the move out inspection checklist. This inspection goes beyond surface-level cleanliness to evaluate the functional integrity of all plumbing, fixtures, and surfaces, protecting the owner's investment from moisture-related deterioration.
The primary objective is to identify any tenant-caused issues that go beyond simple cleaning. This includes checking for leaks, verifying proper function of all fixtures, and spotting early signs of mold or water damage. Comprehensive photographic documentation of these specific issues is crucial for justifying any security deposit deductions and ensuring a quick, cost-effective turn. A consistent inspection process across all units prevents disputes and maintains the long-term value of the assets.
Distinguishing Damage from Wear and Tear
Clearly defining the difference between expected wear and chargeable neglect is vital for fair and efficient bathroom inspections. Standardized criteria help maintain consistency across your entire portfolio.
- Normal Wear and Tear (Not Chargeable): This includes minor soap scum that can be easily cleaned, small scuffs on the vanity, or worn-out caulking due to age. A toilet flapper needing replacement after several years of use typically falls into this category.
- Example 1: A loose or rocking toilet that indicates a broken wax seal, often caused by improper use or unreported issues, which requires removal and re-sealing.
- Example 2: Visible mold growth on shower tiles, grout, or drywall resulting from consistent failure to use the ventilation fan or wipe down surfaces, necessitating remediation.
- Example 3: Damaged, cracked, or missing caulking around the tub or shower base that has allowed water to penetrate the subfloor or wall, leading to potential structural issues.
- Example 4: Excessive hard water or mineral buildup on faucets, showerheads, and drains that is so severe it impedes water flow and cannot be removed with standard cleaning products.
- Example 5: Cracked tiles in the shower or on the floor, chips in the porcelain of the sink or tub, or a non-functioning ventilation fan that was not reported during the tenancy.
5. Doors, Windows, and Hardware
The functionality and condition of doors, windows, and all associated hardware are crucial components of a property's security, energy efficiency, and overall habitability. For property managers overseeing extensive portfolios, a systematic check of these elements is a non-negotiable part of the move out inspection checklist. This inspection confirms that every entry point and opening is secure and operates as intended, preventing future maintenance calls and potential liability issues.
A thorough assessment in this area directly impacts tenant safety and satisfaction, as well as the property's utility costs. Damaged locks, broken seals, or malfunctioning doors can quickly become significant problems for the next resident. After a thorough move-out inspection, property managers often prioritize enhancing security for the next tenant by considering actions like rekeying locks to ensure previous tenants and any third parties no longer have access. This proactive step is essential for maintaining a secure and trustworthy rental portfolio.
Distinguishing Damage from Wear and Tear
Properly distinguishing between normal operational wear and tenant-inflicted damage is key to accurately assessing charges against a security deposit. Standardized criteria across all properties ensure fairness and consistency.
- Normal Wear and Tear (Not Chargeable): This includes minor scuffs on door frames from daily use, slightly loose handles that can be easily tightened, or fading on window frames from sun exposure. Worn-out weatherstripping due to age also typically falls into this category.
- Example 1: A sliding glass door that is off its track or has damaged rollers due to forced or improper operation, requiring professional realignment or parts replacement.
- Example 2: A broken or jammed window lock, which compromises the unit's security and indicates forceful handling rather than normal use.
- Example 3: Torn, bent, or missing window or door screens that were intact at move-in. This includes damage from pets, children, or attempts to remove the screen improperly.
- Example 4: Interior or exterior doors that won't latch or close properly because of damaged hinges, a warped frame from hanging heavy items, or a swollen core from unreported water exposure. This also includes unauthorized locks or hardware installed by the tenant.
6. Cleanliness and Sanitation Standards
The standard of cleanliness upon move-out is a frequent source of security deposit deductions and tenant disagreements. For property managers overseeing large portfolios, enforcing a consistent, high standard of sanitation is essential for reducing unit turn time and ensuring the property is immediately ready for the next resident. This element of your move out inspection checklist is a comprehensive evaluation of the property's overall cleanliness, from surface grime to deep-seated odors, ensuring it meets both habitability and marketability standards.
A property left in a "broom-swept" condition is rarely sufficient. The goal is to verify that the unit has been returned to a professionally clean state, addressing everything from kitchen grease buildup to sanitized bathrooms. Meticulous photo documentation is your best tool for justifying any cleaning charges, transforming a subjective issue into an objective, evidence-backed assessment. You can discover more about creating airtight documentation with these move-out condition report tips from Showdigs.com.
Distinguishing Damage from Wear and Tear
Success in this area relies on a clear definition of "clean" that is communicated to tenants long before the move-out date. Vague requirements lead to disputes, while a detailed checklist sets clear expectations.
- Normal Wear and Tear (Not Chargeable): This includes minor dust in corners, light scuff marks on floors that can be easily cleaned, and minor water spots around faucets. A general need for a standard professional cleaning between tenants is often considered an owner's cost.
- Example 1: A kitchen with a thick, sticky layer of grease on cabinets, backsplashes, and inside the oven and vent hood that requires extensive professional deep cleaning.
- Example 2: Bathrooms with significant soap scum accumulation, hard water stains on glass shower doors, or visible mold and mildew growth in grout lines that necessitate specialized treatment.
- Example 3: Strong, persistent odors from smoking, pets, or cooking that have permeated carpets, drapes, and paint, requiring professional deodorizing treatments or even replacement of materials.
- Example 4: Any personal belongings, trash, or debris left behind by the tenant that requires a junk removal service and subsequent deep cleaning of the vacated areas. For a granular breakdown, a resource like an ultimate end of tenancy cleaning checklist can provide the level of detail needed to set clear expectations.
7. Lighting and Electrical Systems
Faulty electrical systems are more than just an inconvenience; they are a significant liability and a critical safety concern. A comprehensive check of all lighting and electrical components is an essential part of any move out inspection checklist. For property managers handling dispersed portfolios, a standardized protocol for this assessment ensures tenant safety, prevents costly emergency repairs, and protects the property owner from potential legal issues arising from electrical hazards. This inspection is about verifying functionality and identifying any tenant-caused damage or neglect.
A thorough electrical inspection aims to uncover issues ranging from simple burnt-out bulbs to hazardous wiring problems. Documenting these findings with clarity is crucial for appropriately assigning responsibility. When you can prove an outlet was damaged by a tenant's misuse versus failing from age, you can confidently deduct repair costs from the security deposit. This meticulous approach reinforces professional management and safeguards the asset's integrity and value.
Distinguishing Damage from Wear and Tear
Your inspection must clearly separate normal operational failures from tenant negligence. Consistent standards across your portfolio are key to fair and defensible security deposit dispositions.
- Normal Wear and Tear (Not Chargeable): This typically includes a few burnt-out light bulbs, which are often considered a tenant's responsibility to replace during their lease but can be a minor turnover cost. A standard light switch or outlet that fails due to age also falls into this category.
- Example 1: Cracked or broken outlet faceplates, often caused by forcefully plugging in or pulling out cords, or from furniture being pushed against them.
- Example 2: Non-functioning GFCI outlets in kitchens or bathrooms that fail to test/reset due to tenant-induced damage or spills, requiring a full replacement.
- Example 3: Damaged light fixtures, such as broken glass globes, bent arms on a ceiling fan, or fixtures pulled away from the ceiling or wall.
- Example 4: Missing switch or outlet covers, creating a direct electrical hazard. This also includes any signs of amateur wiring or overloaded circuits evidenced by scorch marks or frequently tripped breakers reported by the departing tenant.
8. HVAC System and Air Quality
A functioning HVAC system is not a luxury; it's a fundamental component of a habitable property and a major factor in tenant satisfaction. For property managers overseeing large portfolios, neglecting the HVAC during a move-out inspection can lead to emergency repair calls, increased vacancy periods, and significant unforeseen expenses. This part of the move out inspection checklist involves a thorough evaluation of the heating, ventilation, and air conditioning systems to ensure they are operating correctly and efficiently for the next resident.
The objective is to catch potential system failures or tenant-induced issues before they escalate. A non-functional AC unit discovered on the hottest day of the year or a faulty heater during a cold snap creates a poor tenant experience and reflects badly on your management. Documenting the system's condition upon move-out provides a clear baseline, justifying any necessary maintenance costs and ensuring the unit is rent-ready. To understand how structured, professional evaluations can prevent these costly surprises, consider the benefits of professional property walkthroughs on Showdigs.com.
Distinguishing Damage from Wear and Tear
Properly identifying HVAC issues requires distinguishing between routine maintenance and damage caused by neglect or misuse. Establishing clear standards for this assessment is vital for operational efficiency.
- Normal Wear and Tear (Not Chargeable): This includes minor dust accumulation on vent covers and the need for a routine, scheduled air filter replacement. The system may also show signs of aging consistent with its documented lifespan, which is not the tenant's responsibility.
- Example 1: An extremely clogged or missing air filter that has caused the system to strain, leading to reduced efficiency, frozen coils, or other mechanical failures.
- Example 2: A non-functional or damaged bathroom or kitchen ventilation fan, which can lead to moisture and mold problems if not repaired.
- Example 3: A damaged or improperly reprogrammed thermostat that prevents the system from operating correctly, or a thermostat cover that has been cracked or broken.
- Example 4: Vents or air returns that are deliberately blocked, painted over, or damaged, impeding proper airflow and causing the system to work harder than necessary. Listening for unusual noises like grinding or squealing during operation can also indicate a problem that needs immediate attention.
8-Point Move-Out Inspection Checklist Comparison
From Checklist to Competitive Advantage: Automating Your Turn Process
We've explored the essential components of a comprehensive move out inspection checklist, from assessing paint and flooring to verifying HVAC systems and documenting every detail. A meticulously executed inspection is the bedrock of a smooth unit turn, protecting your assets and ensuring fair security deposit deductions. It’s the first critical step in minimizing disputes and preparing a property for its next resident.
However, for enterprise property management companies managing hundreds or thousands of units across multiple markets, the checklist itself is just the starting point. The real challenge, and the greatest opportunity for optimization, lies in operationalizing this process at scale. A manual, disconnected inspection workflow is a significant operational drag, directly contributing to increased vacancy days and lost revenue.
Beyond the Clipboard: Systemizing for Scale
The transition from a simple checklist to a high-performance system is where leading property managers create a true competitive advantage. This involves moving beyond a paper or spreadsheet-based approach and embracing technology to standardize, accelerate, and analyze the entire turn process. The goal is to make the move-out inspection a predictable, data-driven trigger for all subsequent turn activities, not an administrative bottleneck.
Here are the key takeaways for transforming your move out inspection process:
- Standardization is Non-Negotiable: Every inspector, whether in-house staff or a third-party agent, must use the exact same digital checklist. This ensures consistency across your entire portfolio, from Phoenix to Philadelphia, making damage assessment and cost allocation uniform and defensible.
- Photo Documentation is Your Best Defense: High-resolution, time-stamped photos linked directly to specific checklist items are crucial. This creates an irrefutable record that protects against tenant disputes, which can be costly in both time and legal fees. For a 1,000-unit portfolio, even a 5% reduction in deposit disputes translates to significant administrative savings.
- Speed is a Revenue Driver: The time between a tenant moving out and the completion of the inspection report is a direct factor in your Days on Market (DOM). A delay of even 48 hours in getting the report filed means maintenance and cleaning crews are delayed, pushing back your marketing-ready date and costing you revenue.
Key Insight: For a large portfolio, the move out inspection isn't just an administrative task; it's the starting pistol for the race to re-lease a unit. The faster and more efficiently that pistol is fired, the shorter your vacancy period and the higher your portfolio's revenue performance.
The ROI of an Automated Turn Process
Let's quantify the impact. Imagine your 2,000-unit portfolio has a 50% annual turnover rate, meaning 1,000 unit turns per year. If a manual inspection process adds just three days of avoidable vacancy to each turn, you are accumulating 3,000 lost rental days annually. At an average rent of $2,000/month (approximately $67/day), that equates to over $200,000 in lost revenue each year.
This is where integrating your move out inspection checklist into a larger operational platform becomes a financial necessity. By automating the dispatch of on-demand, vetted agents to conduct inspections the moment a tenant vacates, you can slash those initial lag days. The digital report is instantly available, allowing your maintenance coordinators to schedule vendors immediately, transforming a sequential, delay-prone process into a streamlined, parallel workflow. This automation doesn't just make your team more efficient; it directly shortens the turn cycle, reduces DOM, and recaptures significant revenue for your portfolio. Mastering this isn't just about better operations, it's about fundamentally improving your unit economics at scale.
Ready to eliminate inspection delays and accelerate your speed-to-lease? Showdigs integrates on-demand fieldwork, including comprehensive move-out inspections, directly into your property management workflow. Our platform helps you automate the entire turn process, from inspection to showings, cutting down your vacancy days and maximizing portfolio revenue. Learn how Showdigs can transform your turn process today.