

For property managers overseeing portfolios of 100 to 10,000+ units, the move-in inspection is a critical operational chokepoint where risk and revenue collide. A single undocumented scuff or malfunctioning appliance across a distributed portfolio isn't just a tenant annoyance; it's a data point in a larger pattern of potential revenue loss, increased maintenance overhead, and a slower speed-to-lease. Traditional, inconsistent inspection methods simply don't scale, creating process gaps that directly impact your cost per door and expose your portfolio to significant financial liability from security deposit disputes.
This article provides a standardized, scalable framework for the move in inspection checklist, engineered for the operational realities of enterprise-level property management. By implementing a systematic, tech-forward approach, you can mitigate the financial drain from undocumented damages and streamline the turn process. According to data from the National Multifamily Housing Council, the average cost of a unit turn can exceed $2,500, with disputes over pre-existing conditions being a major contributor to both costs and delays. A well-documented inspection is a direct lever for reducing these turn costs and protecting revenue.
We will provide an actionable blueprint that breaks down the eight essential inspection zones for multi-market portfolios. Following this comprehensive move in inspection checklist will help you systematically document property conditions to slash dispute rates, optimize future maintenance workflows, and protect your revenue per door. This isn't just about ticking boxes; it's about implementing a scalable system that fortifies your bottom line and accelerates your speed-to-leaset.
1. Electrical Systems and Safety: Mitigating Risk from the Start
Before a tenant ever steps foot in a property, a rigorous electrical system check is non-negotiable. This foundational step in the move in inspection checklist goes far beyond simply flipping a switch; it's a critical risk mitigation strategy that protects tenants, properties, and your company's bottom line. For property managers overseeing hundreds or thousands of units, standardizing this inspection prevents significant liability and ensures consistent safety standards across a distributed portfolio. A single electrical fire or injury can lead to catastrophic financial and reputational damage, making this check an essential part of your operational framework.
A thorough inspection involves systematically testing every electrical component. This includes all outlets, light switches, fixtures, ceiling fans, and the circuit breaker panel. The goal is to confirm functionality and identify potential hazards before they escalate. For a comprehensive guide to identifying hazards and ensuring compliance within electrical systems, refer to an essential electrical inspection checklist.
Key Inspection Points and Actionable Tips:
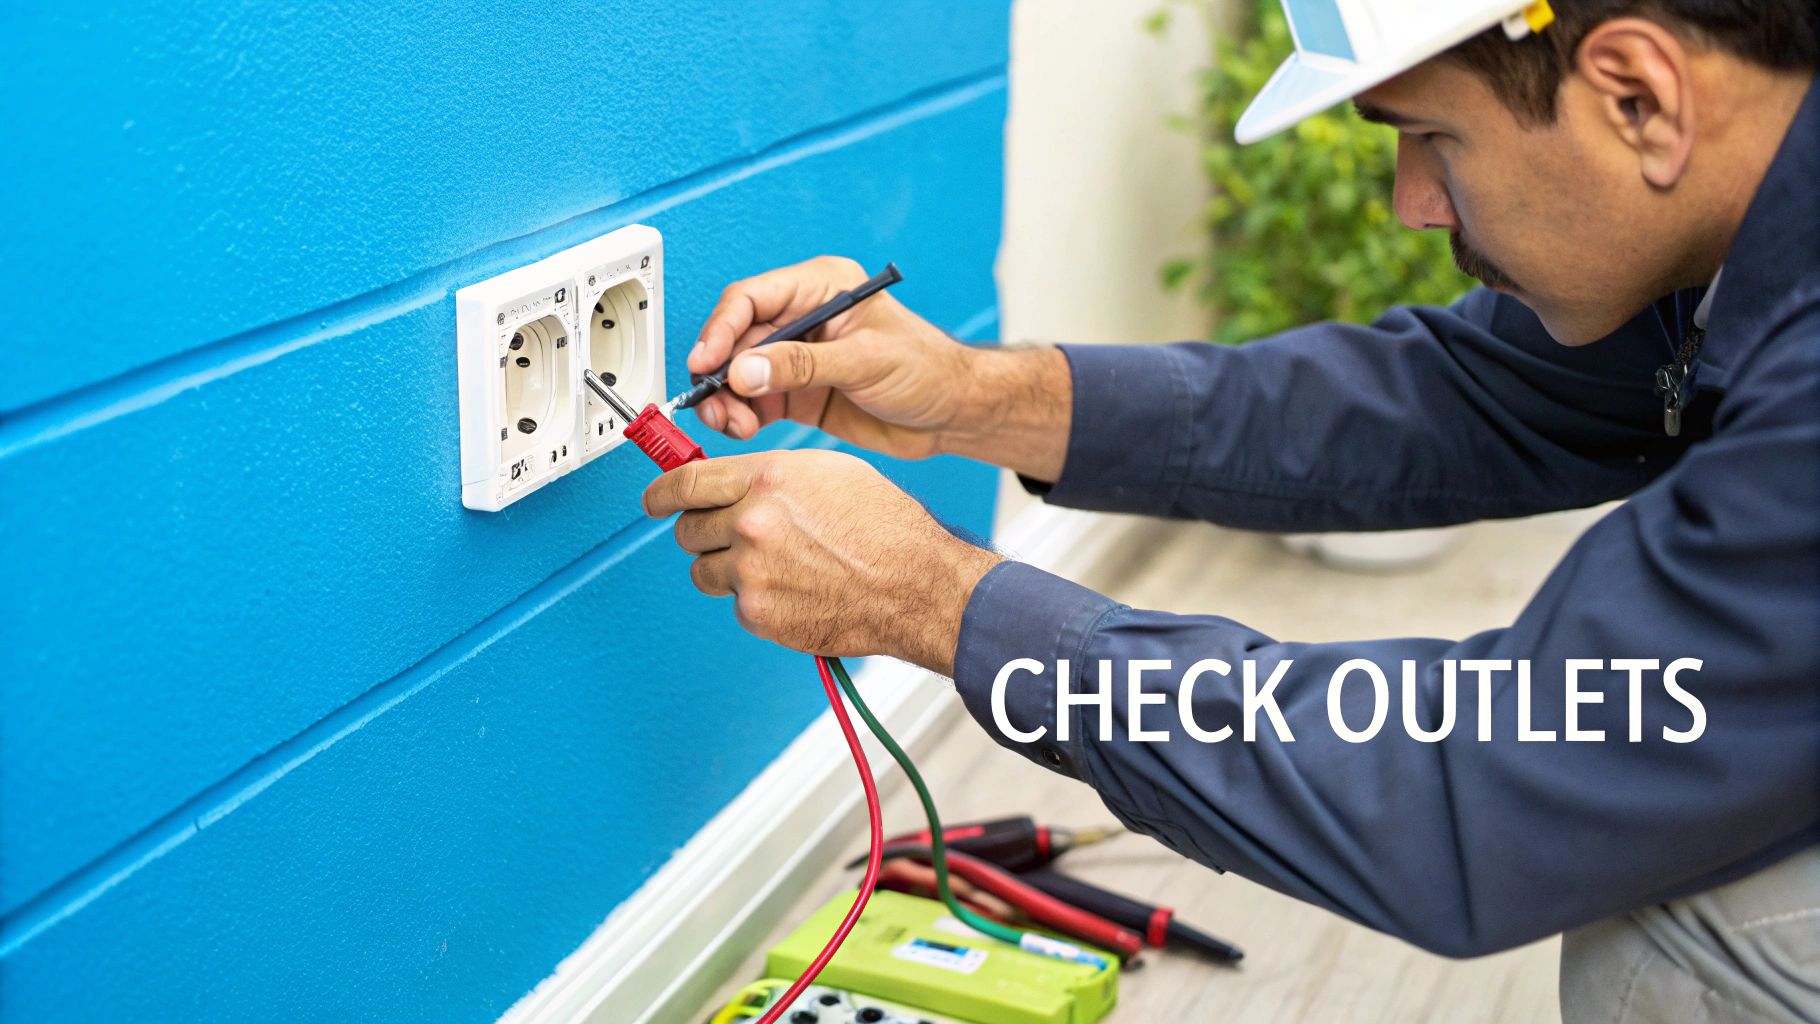
Outlet and GFCI Testing: Arm your field teams with a simple, inexpensive plug-in outlet tester. These devices can instantly confirm if an outlet is powered, wired correctly, and properly grounded. Pay special attention to Ground Fault Circuit Interrupter (GFCI) outlets in kitchens, bathrooms, garages, and outdoor areas. Manually press the "TEST" and "RESET" buttons on each one to ensure they trip and restore power correctly. A non-functional GFCI is a serious safety violation that must be addressed immediately.
Switches, Fixtures, and Covers: Methodically test every light switch and fixture. Look for flickering or dimming lights when appliances are turned on, as this can indicate overloaded circuits or faulty wiring, common issues in older properties. Crucially, ensure every switch and outlet has a secure, unbroken cover plate. Missing or cracked covers expose live wires, creating a significant shock hazard, especially for tenants with children.
Circuit Breaker Panel: Open the electrical panel to check for clear, accurate labeling of circuits. This is vital for both tenant convenience and emergency situations. Look for any signs of scorching, rust, or tripped breakers that won't reset, which signal deeper problems requiring a licensed electrician.
By systematizing these electrical checks as part of every move-in process, you create a documented, repeatable system that minimizes risk at scale. This proactive approach not only ensures tenant safety but also prevents costly emergency repairs and reduces potential liability across your entire portfolio.
2. Plumbing and Water Systems: Preventing Costly Water Damage
A comprehensive plumbing inspection is a cornerstone of any effective move in inspection checklist, serving as a critical preventative measure against one of the most common and costly sources of property damage. For property managers overseeing large-scale portfolios, undetected leaks or drainage issues can quickly multiply, leading to extensive structural repairs, mold remediation, and significant financial loss across multiple units. Implementing a standardized plumbing check protects property value and prevents the type of slow, hidden damage that erodes profitability over time.
A thorough plumbing assessment involves systematically checking all fixtures for functionality, pressure, and signs of leakage. This includes every faucet, toilet, shower, and visible pipe. The objective is to identify and resolve potential issues like low water pressure, slow drains, or minor drips before they escalate into major emergencies, ensuring tenant satisfaction and mitigating long-term maintenance costs.
Key Inspection Points and Actionable Tips:
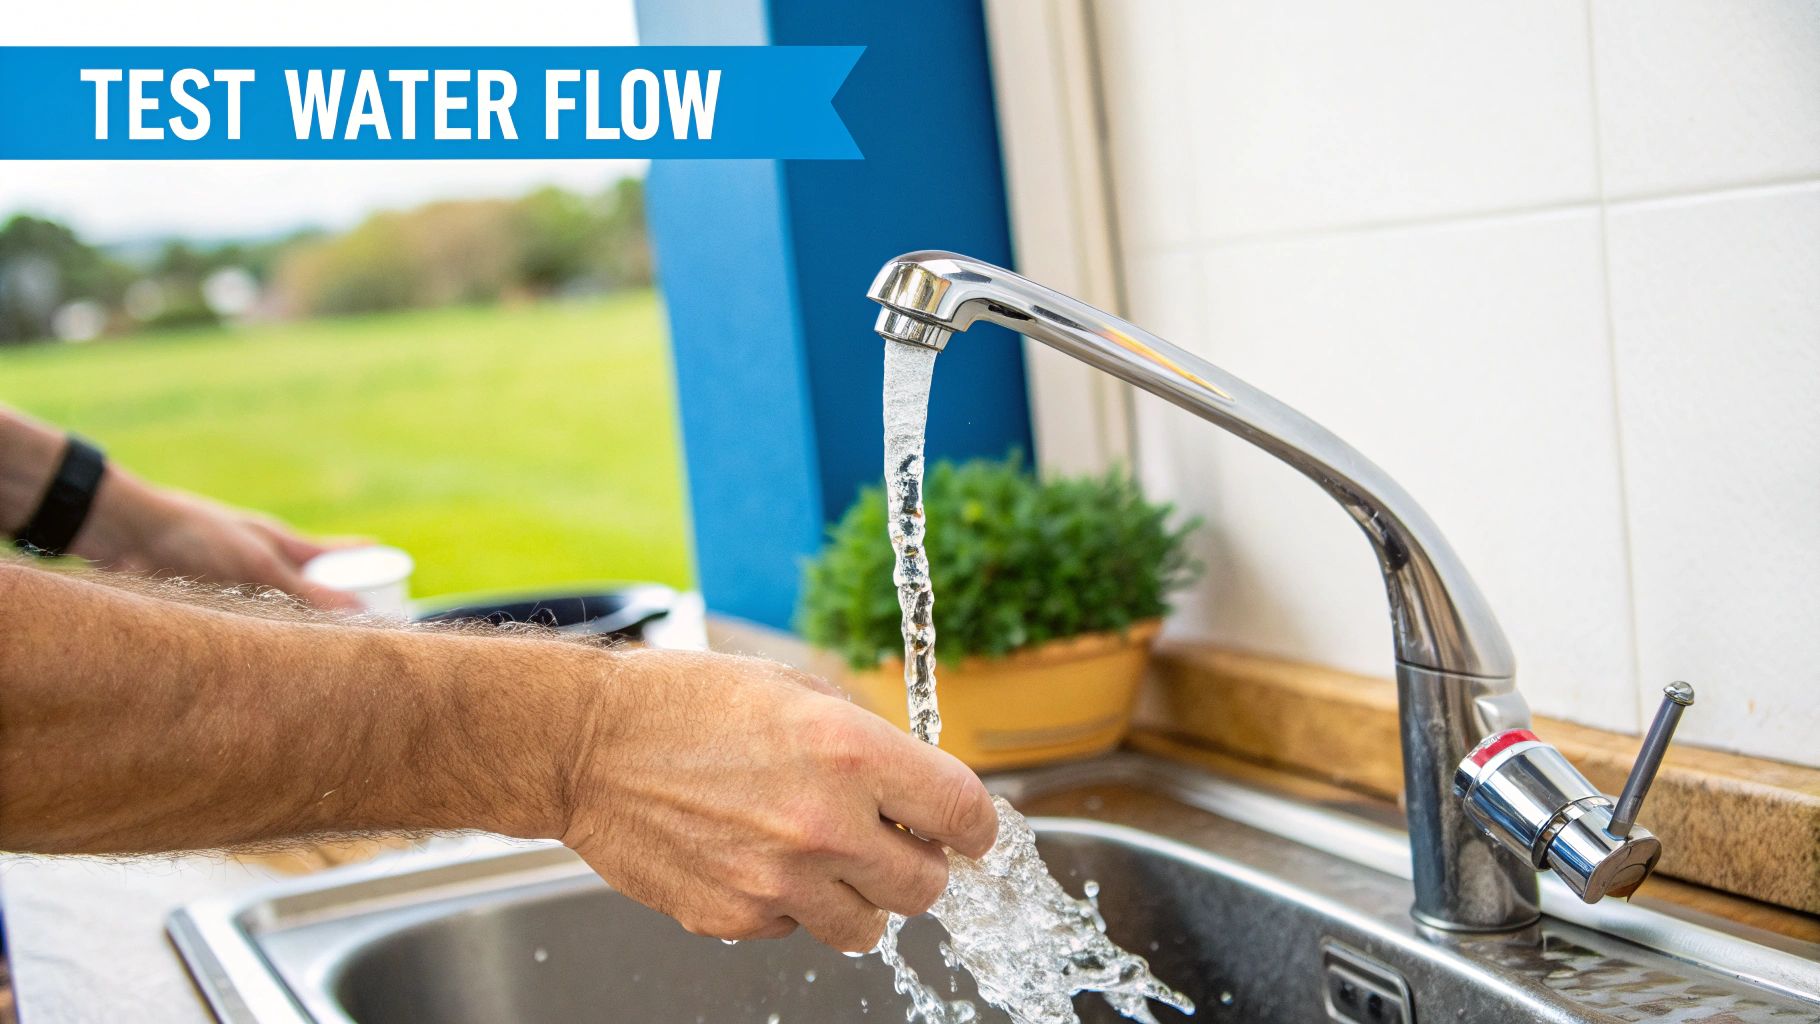
Faucets, Sinks, and Drains: Turn on every faucet (hot and cold) in the kitchen and bathrooms. Note the water pressure; significantly low pressure could indicate pipe blockages or systemic issues. While the water is running, use a flashlight to check under every sink cabinet for drips, water stains, or active leaks from supply lines or P-traps. Finally, confirm that all sinks drain quickly and without gurgling sounds, which might suggest a partial clog.
Toilets and Water Damage: Flush every toilet to verify a strong flush and proper, complete refill of the tank and bowl. Listen for any sounds of continuous running water after the tank has filled, as this indicates a faulty flapper or fill valve, a common cause of high water bills. Critically, inspect the base of each toilet and the surrounding floor for any signs of water damage, discoloration, or softness, which could signal a leaking wax ring.
Showers and Tubs: Test the shower heads for both water pressure and temperature control. A weak or erratic spray often points to mineral buildup that can be easily cleaned. Check the tub faucet and diverter to ensure they function correctly. Carefully inspect the grout and caulking around tubs and shower enclosures for cracks or gaps where water could seep behind walls, a frequent source of mold growth.
By integrating these systematic plumbing checks into every move-in inspection, you establish a documented defense against water-related liabilities. This proactive approach not only secures the physical asset but also reinforces operational efficiency, preventing expensive emergency calls and preserving the profitability of your entire portfolio.
3. HVAC System Functionality: Protecting Tenant Comfort and Operational Budgets
A functional HVAC system is a cornerstone of tenant satisfaction and a critical component of a property manager's operational strategy. Beyond basic comfort, a thorough HVAC inspection during the move-in process directly impacts utility costs, prevents costly emergency service calls, and safeguards the longevity of expensive equipment. For property managers overseeing vast portfolios, a standardized HVAC check on every turn is essential for maintaining asset value and preventing a cascade of tenant complaints and unexpected capital expenditures. This part of the move in inspection checklist is a proactive measure to ensure habitability and control operational costs at scale.
A comprehensive HVAC assessment involves more than just verifying that air is blowing; it requires testing all functions and inspecting key components. The goal is to identify underlying issues like poor airflow, failing parts, or inefficient operation before a tenant moves in. This preemptive check is crucial for minimizing a property's days on market, as a non-functional AC or heater can be an immediate deal-breaker for prospective tenants, especially during extreme weather seasons.
Key Inspection Points and Actionable Tips:
Test All Modes and Thermostat Response: Regardless of the season, test both the heating and cooling functions of the HVAC system. Let each mode run for several minutes to confirm it produces appropriately conditioned air. Crucially, test the thermostat's responsiveness. Set the temperature significantly higher or lower than the ambient room temperature to ensure it correctly triggers the system and then shuts off once the target temperature is reached. A faulty thermostat can lead to constant system cycling, high energy bills, and tenant dissatisfaction.
Air Filter and Airflow Inspection: One of the simplest yet most impactful checks is the air filter. A dirty, clogged filter is a primary cause of reduced efficiency, poor air quality, and system strain. Note the filter's condition and size, and replace it with a new one as a standard procedure for every move-in. While the system is running, walk through the property to check the airflow from every vent. Ensure all vents are open, unobstructed, and delivering consistent airflow. Weak or non-existent flow in certain areas can indicate blocked ductwork or other deeper system problems.
Listen for Irregular Noises: Turn off all other sources of noise and listen carefully as the HVAC system starts up, runs, and shuts down. Grinding, squealing, or loud banging sounds are immediate red flags that signal mechanical problems, such as a failing motor or a loose component. Documenting these sounds and scheduling a professional service call before the tenant moves in can prevent a complete system failure and a much more expensive emergency repair down the line.
4. Structural Integrity and Safety: Protecting Habitability and Investments
A property's structural integrity is the backbone of tenant safety and asset preservation. Examining key structural components during the move-in inspection is a fundamental process that goes beyond aesthetics to address core habitability standards. For property managers responsible for large, distributed portfolios, a standardized structural check is crucial for identifying potential high-cost repairs, mitigating liability from safety hazards, and ensuring a consistent standard of quality across all units. Ignoring subtle structural issues can lead to escalating damage, costly emergency interventions, and significant risk to tenant well-being.
A comprehensive structural assessment involves a systematic walkthrough to evaluate walls, floors, ceilings, doors, windows, and stairs. The objective is to proactively identify and document any wear, damage, or safety flaws that could compromise the property's condition or tenant safety. Establishing a clear, documented baseline is essential for accurately assigning responsibility for any future damage. To gain a deeper understanding of this process, you can explore detailed guides that cover the essentials of move-in inspections for rental properties.
Key Inspection Points and Actionable Tips:
Floors, Walls, and Ceilings: Systematically walk through every room, paying close attention to the feel of the floor. Test for any soft spots, sponginess, or significant sagging, as these are often indicators of underlying water damage or subfloor issues. Visually inspect all walls and ceilings for large cracks (generally wider than 1/4 inch), water stains, or bowing. Documenting these with photos and measurements provides an indisputable record of the property’s condition at move-in.
Doors and Windows: Test every single interior and exterior door. Ensure they open, close, and latch securely. A door that sticks or doesn't align with its frame can signal foundation settling. Check all windows for smooth operation, functional locks, and intact screens. A window that fails to lock properly is a major security and liability issue that requires immediate repair.
Stairs and Railings: Pay special attention to staircases. Each step should feel solid and secure underfoot. Crucially, test all handrails and guardrails for stability. A loose or wobbly railing is a significant fall hazard and a critical safety failure. Ensure that railings are present where required by local building codes, especially on porches, decks, and stairways.
By integrating these structural checks into your move in inspection checklist, you create a powerful system for risk management at scale. This methodical approach not only upholds your duty to provide a safe and habitable home but also protects your assets from neglect and minimizes expensive, unforeseen repairs across your portfolio.
5. Appliance Condition and Operation: Ensuring Tenant Satisfaction and Preventing Future Costs
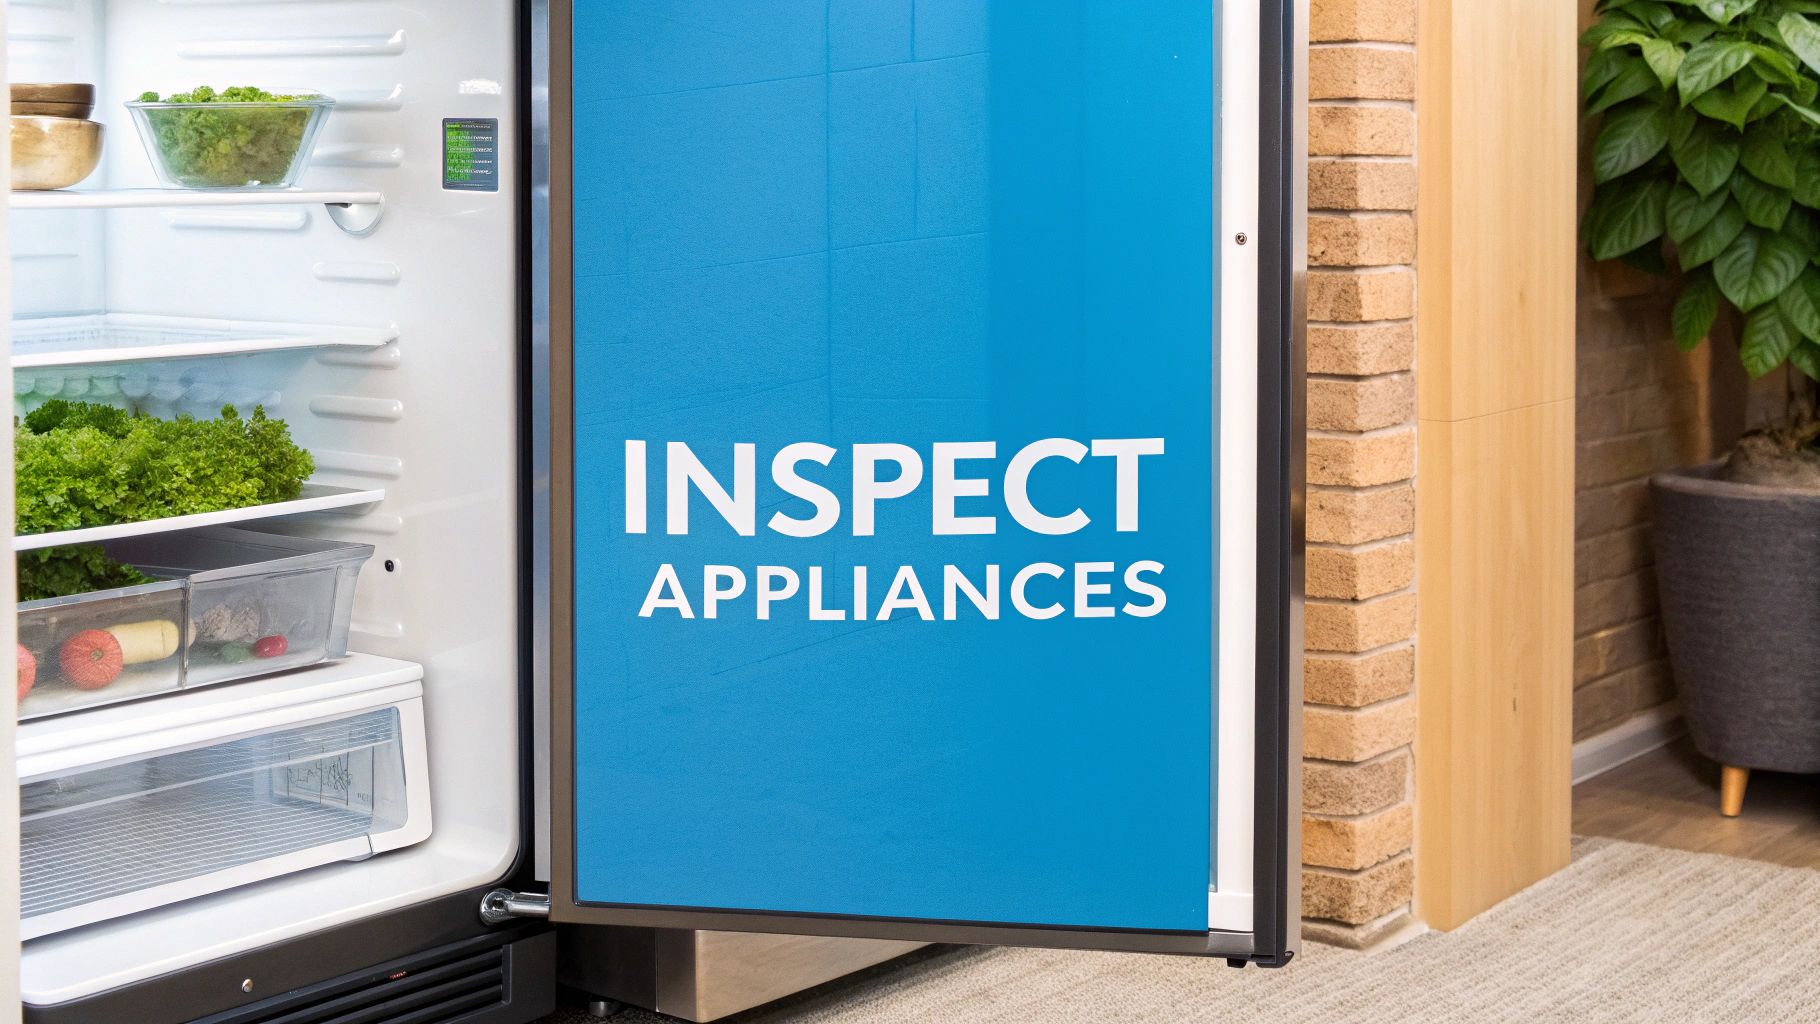
For property managers overseeing large portfolios, functional appliances are a cornerstone of tenant satisfaction and operational efficiency. A malfunctioning refrigerator or a leaking dishwasher discovered after move-in creates immediate tenant frustration and triggers costly, reactive maintenance requests. Systematically verifying the condition and operation of every appliance as a standard part of your move in inspection checklist is a proactive strategy to prevent these issues, reduce maintenance overhead, and protect the asset's value. This step ensures the property is truly "rent-ready" and minimizes post-move-in disputes that can strain tenant relations and consume valuable staff time.
A comprehensive appliance check goes beyond a simple power-on test. It involves running appliances through their primary cycles to confirm they perform as expected under normal usage conditions. This process helps identify hidden issues, such as an oven that fails to maintain temperature or a dryer that doesn't properly vent, which are common sources of tenant complaints. Documenting the working order of each appliance provides a clear baseline, mitigating liability for damages that may occur during the tenancy.
Key Inspection Points and Actionable Tips:
Refrigerators and Freezers: Don't just check if the light turns on. Place a thermometer inside both the refrigerator and freezer compartments to verify they reach and maintain appropriate temperatures (typically below 40°F for the fridge and 0°F for the freezer). Confirm that ice makers are operational and that water dispensers function without leaks.
Cooking Appliances (Oven, Stovetop, Microwave): Test every burner on the stovetop to ensure it heats up properly. For ovens, test both the bake and broil functions to confirm the heating elements are working. Turn on the microwave to ensure it heats a cup of water. Check that all knobs, buttons, and digital displays are fully functional and that oven lights work correctly.
Dishwashers and Laundry Units: Run the dishwasher through a complete cycle. This is the only way to effectively check for leaks, verify proper draining, and ensure the spray arms are functioning. For washers, run a short cycle to check for leaks and proper spinning. For dryers, confirm that the unit heats up and that the vent is clear of lint and debris to prevent a significant fire hazard.
Documentation and Wear-and-Tear: Thoroughly photograph each appliance, paying close attention to any existing cosmetic damage like scratches or dents. Documenting pre-existing wear is critical for accurately assessing tenant-caused damage at move-out. This detailed record, logged within your property management system, provides irrefutable evidence that protects the owner's investment and ensures fair handling of the security deposit.
6. Safety and Security Features: Ensuring Tenant Peace of Mind
Beyond basic habitability, a property manager's core responsibility is ensuring a tenant feels safe and secure in their new home. This element of the move in inspection checklist is paramount, as failures in this area represent significant liabilities and can irreparably damage tenant trust. For property management companies overseeing large, distributed portfolios, standardizing the verification of all safety and security features is a critical operational protocol. A single security lapse or safety device failure can lead to preventable harm, legal action, and substantial reputational damage, making this check a non-negotiable part of your risk management strategy.
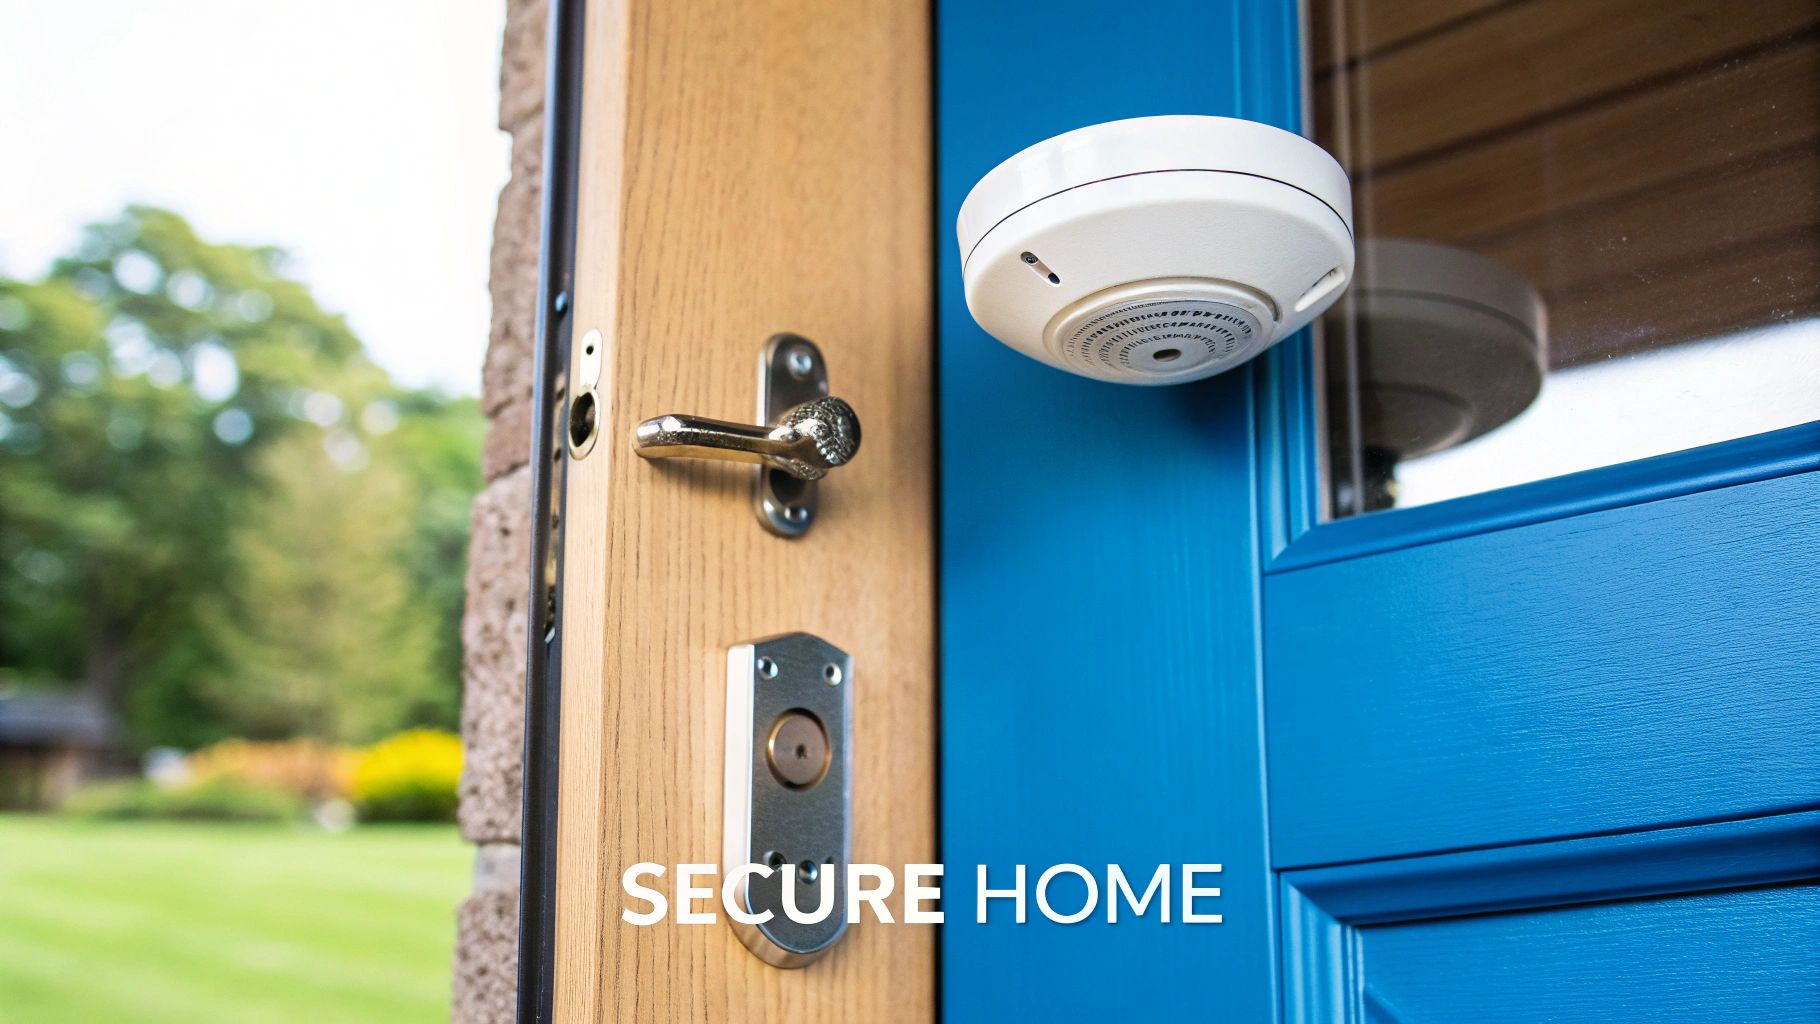
A comprehensive safety inspection involves methodically testing every device designed to protect the resident and the property. This includes smoke detectors, carbon monoxide (CO) detectors, all window and door locks, and any installed security systems. The objective is to verify complete functionality and identify any vulnerabilities that could compromise tenant safety or asset security. This systematic approach ensures every property in your portfolio meets a consistent, high standard of safety before occupancy.
Key Inspection Points and Actionable Tips:
Life-Safety Device Testing: Systematically test every smoke and carbon monoxide detector in the unit. Press the "TEST" button on each device and listen for the audible alarm. Document the expiration date printed on the back of each detector; most have a lifespan of 7-10 years. A non-functional or expired detector is a serious compliance issue and must be replaced immediately. Note the location of each device for future maintenance schedules and tenant reference.
Locks and Access Control: Physically check every exterior door to confirm it has a functional, properly installed deadbolt. The deadbolt should engage smoothly and securely. Inspect all windows, especially on the ground floor, to ensure their locks are present and fully operational. Broken or missing locks are an open invitation for unauthorized entry and must be repaired before the tenant moves in.
Security System Verification: If the property is equipped with a security system, verify its status. Document the make and model, and ensure you have the master codes and operating instructions to provide to the tenant. Confirm whether the system is actively monitored or if the tenant will need to establish service. Once your move-in inspection confirms existing security features are operational, ensuring their ongoing reliability is key. For a comprehensive guide on maintaining your security systems, consider this security system maintenance checklist.
By formalizing these safety and security checks within your move in inspection checklist, you create a documented record of due diligence. This protects your company from liability and demonstrates a clear commitment to tenant well-being, a crucial factor in attracting and retaining high-quality residents across your entire portfolio.
7. Cleanliness and Maintenance Standards: Setting the Baseline for Occupancy
Establishing a definitive baseline for cleanliness and maintenance is a cornerstone of the move-in process. This element of the move in inspection checklist is about more than just surface-level tidiness; it's about documenting the exact condition of the property to prevent future disputes and align tenant expectations. For property management companies handling expansive portfolios, a standardized cleanliness protocol is crucial for brand consistency and operational efficiency. Failing to document the move-in condition meticulously can lead to contentious security deposit deductions and damage to your company’s reputation.
A rigorous cleanliness and maintenance assessment involves a detailed walkthrough to identify any pre-existing issues. This includes everything from scuff marks on walls and stained carpets to evidence of pest activity or lingering odors. The goal is to create an undisputed record that protects both the tenant and the property owner. Any issues identified become a clear to-do list for your maintenance teams, ensuring the unit meets your company's quality standards before the lease begins. A clear understanding of how to manage and resolve these items is essential; you can learn more about how to prioritize tenant maintenance requests to streamline this process.
Key Inspection Points and Actionable Tips:
Comprehensive Photographic Record: Go beyond a simple walkthrough. Systematically take detailed, high-resolution photos and videos of every room, focusing on floors, walls, ceilings, and fixtures. Crucially, document the condition inside appliances, cabinets, and closets. This creates a visual baseline that is irrefutable. Time-stamped photos are the ultimate tool for resolving security deposit disputes months or years later.
Check for Hidden Issues: Look for signs of problems that aren't immediately obvious. Check for evidence of pests, such as droppings, nests, or chew marks, particularly in kitchens, pantries, and utility closets. Note any unusual or strong odors, which could indicate underlying issues like hidden mold, mildew, or the need for deep cleaning to remove smoke smells.
Detailed Written Documentation: Supplement your visual record with a written list. Document every scuff, stain, crack, or area of wear and tear. Be specific: instead of "wall scuffed," write "3-inch black scuff mark on the east wall of the master bedroom, next to the window." This level of detail removes ambiguity and provides a clear checklist for any necessary repairs or cleaning before occupancy.
By standardizing this deep-dive into the property's condition as part of every move in inspection checklist, you create a defensible record that minimizes liability. This proactive step ensures units are delivered in a consistent, high-quality state, which improves tenant satisfaction and protects the asset value across your entire portfolio.
8. Documentation and Record Keeping: Your Definitive Liability Shield
A move-in inspection without meticulous documentation is a missed opportunity for risk management. Systematic record-keeping transforms a routine task into a powerful liability shield, creating an indisputable baseline of the property's condition at the start of a lease. For property managers overseeing vast, distributed portfolios, standardized documentation is the backbone of dispute resolution, security deposit management, and operational consistency. It protects your assets and your company from "he said, she said" arguments over damages, which can erode profitability and damage your reputation at scale.
Thorough documentation involves more than just a signed piece of paper; it requires a multi-faceted approach combining high-resolution images, detailed written descriptions, and standardized forms. This comprehensive record serves as the single source of truth for the property's condition, crucial for enforcing lease terms and justifying any deductions from a security deposit upon move-out. Implementing robust condition reports and property checks ensures this critical data is captured accurately and consistently across every unit in your portfolio.
Key Inspection Points and Actionable Tips:
Comprehensive Photo and Video Evidence: Go beyond a few general shots. Arm your team with a protocol to photograph every room from multiple angles. Crucially, capture close-up, high-resolution images of any pre-existing issues: a carpet stain, a scuff on the wall, a chip in a countertop, or normal wear and tear on flooring. Ensure all photos and videos are automatically timestamped to verify when they were taken. This visual evidence is often the most compelling part of your move in inspection checklist record.
Standardized Inspection Forms: Use a detailed, standardized digital or physical inspection form for every property. This form should list every room and feature, from appliances and flooring to windows and light fixtures, with columns for "Good," "Fair," "Poor," or "Damaged," along with a space for notes. This structure ensures no area is overlooked and provides a consistent data-collection framework across your entire portfolio.
Signatures and Secure Storage: The final step is securing signatures from both the tenant and a company representative on the completed inspection form. This formalizes the agreement on the property's initial condition. Maintain both digital and physical copies of all signed documents, photos, and videos. A secure, cloud-based storage system is ideal for large-scale operations, ensuring records are easily accessible, searchable by property address, and protected from loss.
8-Point Move-In Inspection Checklist Comparison
From Checklist to Competitive Advantage: Automating Inspections for Enterprise Growth
Completing a thorough move-in inspection is not merely an administrative task; it is a foundational element of scalable, professional property management. As we've detailed, a comprehensive move in inspection checklist is your first line of defense in asset protection, dispute prevention, and tenant relationship management. It transforms a subjective process into an objective, data-driven operation. By systematically verifying everything from electrical and plumbing systems to appliance functionality and overall cleanliness, you create an indisputable record of property condition. This record is critical for accurately assessing security deposit claims and ensuring fair, transparent resolutions at move-out.
For enterprise-level property management companies managing hundreds or thousands of units, the value of this process multiplies exponentially. Consistency across a distributed portfolio is paramount. A standardized checklist ensures that a property in one state is evaluated with the same rigor as a property in another, eliminating operational drift and providing leadership with a unified view of asset health. This level of standardization directly impacts your bottom line by minimizing disputes, reducing turn-related maintenance costs, and safeguarding your assets against undocumented damage.
The Strategic Shift from Manual to Automated
The true competitive advantage, however, lies in moving beyond the paper checklist. The principles outlined in this guide-meticulous documentation, photographic evidence, and systematic evaluation-are the building blocks. The next evolution for scaling operations is to embed these principles into an automated, technology-driven workflow. This is where a simple checklist becomes a powerful operational tool that directly impacts your most critical KPIs.
Automating the inspection process provides several key advantages for large portfolios:
- Operational Efficiency: Manual coordination of inspections across a dispersed portfolio is a significant drain on resources. Automation centralizes scheduling, reporting, and data storage, drastically reducing administrative overhead and improving your cost per door.
- Data Integrity and Accessibility: Digital reports are immediately accessible to your entire team, stored securely in the cloud, and integrated with your Property Management System (PMS). Leveraging technology to automate your move-in inspections often involves transitioning from paper to digital forms for inspections. This not only streamlines the process but also enhances accuracy and accessibility.
- Reduced Vacancy Costs: A streamlined, automated inspection process is a key component of an accelerated leasing cycle. Faster inspections mean faster turn times, which directly contributes to reducing Days on Market (DOM). For a 1,000-unit portfolio with a $1,500 average rent, cutting just two days off your vacancy cycle across the portfolio can recover $10,000 in lost revenue daily during peak leasing season.
Actionable Next Steps for Enterprise Growth
To translate the concepts from this article into tangible results, your focus should be on systemization and technology adoption. Begin by auditing your current inspection process. Is it standardized across all properties? Is the data captured consistently and stored centrally? If the answer is no, or if the process relies on manual coordination and disparate tools, it's time to build a scalable framework.
The ultimate goal is to integrate your move in inspection checklist into a holistic leasing platform. This creates a seamless workflow from the moment a lead expresses interest to the day a new tenant moves in. When a prospect can tour a property, sign a lease, and have a comprehensive, digitally-signed condition report completed within a single, streamlined system, you not only improve the tenant experience but also create immense operational leverage. This integrated approach is the key to managing a remote-first portfolio effectively and profitably, transforming a necessary compliance task into a strategic engine for growth and revenue protection.
Ready to transform your move-in inspections from a logistical burden into a scalable, revenue-driving asset? Showdigs provides a comprehensive leasing platform with on-demand field agents who conduct standardized, photo-documented condition reports, all integrated directly into your workflow. See how Showdigs can help you reduce DOM, protect your assets, and streamline operations across your entire portfolio.