

For property managers overseeing portfolios of 1,000 units or more, every vacant day is a direct hit to the bottom line. Reducing Days on Market (DOM) isn't about luck; it's about deploying a repeatable, scalable process. While tenants follow their own renting a home checklist to navigate their journey, enterprise-level operators need a systemized framework to accelerate their entire leasing funnel. The goal is to optimize lead-to-tour conversions and ensure a seamless handoff from application to move-in, cutting costly vacancy periods across a distributed portfolio.
This guide reframes the standard tenant checklist into a strategic operational blueprint. It provides actionable steps for large-scale property management companies to enhance leasing velocity, reduce administrative overhead per door, and directly impact portfolio revenue. For context, a 2,000-unit portfolio with an average rent of $1,800/month loses $120,000 in potential revenue for every single day of vacancy across the portfolio. To further streamline the renter journey and minimize vacancy gaps, understanding the tenant's move-in logistics is also crucial. A valuable resource offering a comprehensive home moving checklist and pro tips can help your team anticipate tenant needs and coordinate smoother transitions.
We will explore ten critical checkpoints, transforming them from simple tenant-side tasks into scalable systems that drive efficiency and consistency across your entire portfolio. By systemizing these steps, you can create a predictable leasing engine that converts qualified leads into signed leases faster, safeguarding your assets and maximizing owner returns. This isn't just a checklist; it's a model for operational excellence at scale.
1. Review and Understand the Lease Agreement
The lease agreement is the single most important document in the landlord-tenant relationship, acting as the legally binding contract that governs the entire tenancy. For property managers, ensuring a prospective tenant fully understands this document is not just a formality; it is a critical step in risk mitigation and operational efficiency. A well-understood lease minimizes future disputes, reduces time spent on clarifications, and sets a professional tone from day one. This foundational clarity is an indispensable part of any comprehensive renting a home checklist.

Why This Step is Crucial for Operational Success
A tenant who has thoroughly reviewed their lease is less likely to violate its terms, leading to fewer compliance issues for your team. When a tenant knows the exact date rent is due, understands the late fee structure, and is aware of the 60-day notice requirement for non-renewal, it streamlines rent collection and portfolio planning. This proactive approach significantly cuts down on the administrative burden of chasing payments or managing unexpected vacancies across hundreds or thousands of units.
Actionable Tips for Property Managers
To ensure tenants properly review the lease, property managers can implement a clear, systematic process that benefits both parties and enhances the leasing experience.
- Provide a Digital Copy in Advance: Send the lease agreement to the applicant at least 24-48 hours before the scheduled signing. This gives them ample time to read it without pressure.
- Highlight Key Clauses: Create a one-page "Lease Summary Sheet" or use digital highlighting tools to draw attention to critical sections like rent payment details, maintenance request procedures, pet policies, and termination clauses.
- Schedule a Brief Review Call: Offer a 15-minute call to walk through the summary sheet and answer any questions. This builds trust and ensures comprehension, preventing misunderstandings that could disrupt operations later.
- Require an Initialed Checklist: Include a checklist at the beginning of the lease where the tenant must initial next to key statements, such as "I understand the late fee policy" or "I acknowledge the property is non-smoking." This creates a documented record of their acknowledgment.
2. Document the Property Condition with Photos and Video
A detailed move-in condition report, supported by a comprehensive visual record, is a non-negotiable step in asset protection. For property managers overseeing large, distributed portfolios, this documentation is the primary defense against unwarranted security deposit disputes, which can escalate into costly legal challenges and damage a company's reputation. Establishing a clear, undisputed baseline of the property's condition before tenant occupancy is a critical risk management strategy and a key component of an effective renting a home checklist.
Why This Step is Crucial for Operational Success
A robust visual record streamlines the move-out process, which is often a source of friction and administrative burden. When a tenant disputes a deduction for a large carpet stain or a broken fixture, time-stamped photos from move-in can resolve the issue in minutes, not weeks. This evidence-based approach minimizes he-said, she-said arguments, reduces the staff time required for dispute resolution, and ensures your security deposit dispositions are legally defensible across your entire portfolio.
Actionable Tips for Property Managers
To systematize this process across a large portfolio, property managers should implement a standardized, tech-enabled documentation procedure that ensures consistency and irrefutable proof.
- Create a Standardized Shot List: Develop a required photo and video checklist for every property type. This should include wide shots of each room, close-ups of all appliances, flooring, walls, fixtures, and any pre-existing wear and tear.
- Use a Time-Stamping App: Require leasing agents or tenants to use a mobile app that automatically embeds the date and time onto each photo and video. This adds a layer of verifiable evidence that is difficult to dispute.
- Mandate Video Walkthroughs: A narrated video walkthrough is incredibly effective. The person conducting the tour can verbally point out the condition of specific items, such as "testing all stove burners, all are functional," providing both visual and audio documentation.
- Centralize and Secure Storage: Immediately upload all visual documentation to a centralized, cloud-based folder for that specific property and tenancy. This prevents data loss and ensures the records are easily accessible by your team during the move-out inspection.
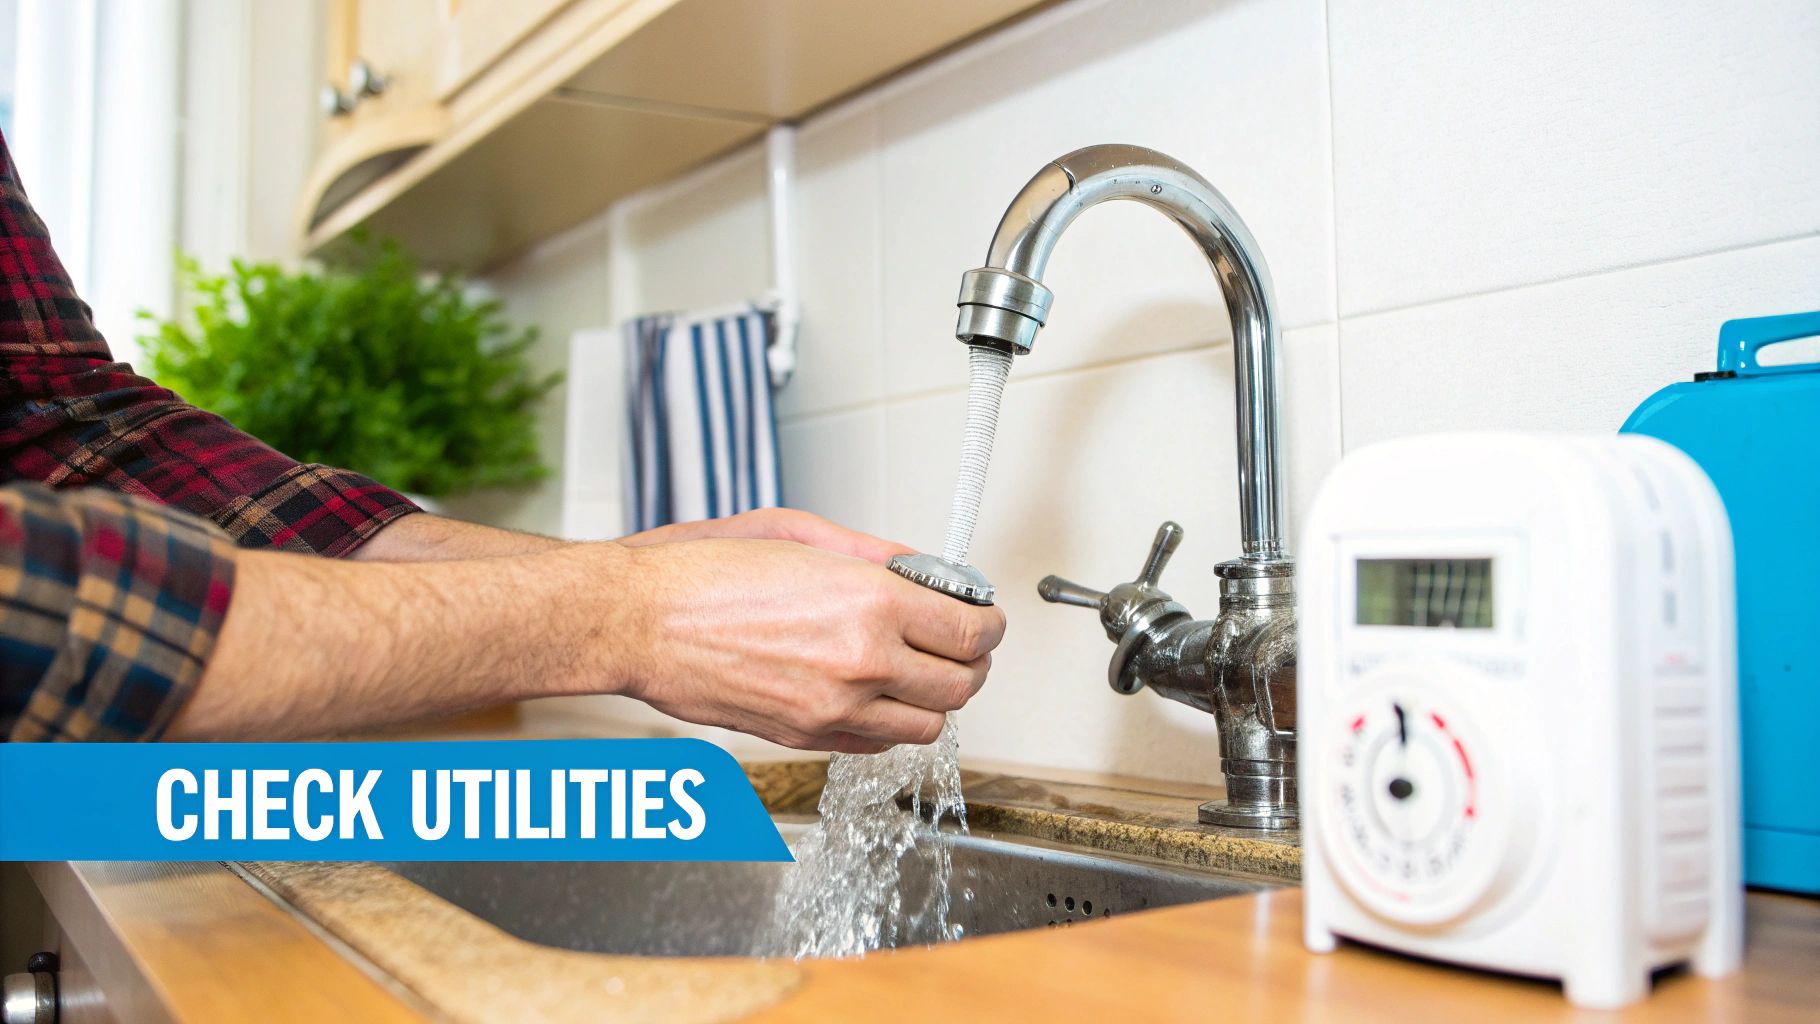
3. Verify Utilities and Service Accessibility
A smooth move-in day can derail instantly if a tenant discovers the water isn't running or the electricity is off. Verifying that all essential utilities are functional and that service accounts are correctly transferred is a non-negotiable step in a property manager's pre-tenancy workflow. This proactive check prevents frantic, last-minute service calls, ensures tenant safety and comfort from hour one, and protects the property from potential damage, making it a vital part of any renting a home checklist.
Why This Step is Crucial for Operational Success
For large portfolios, a single utility-related issue can create a cascade of operational headaches, from dispatching emergency maintenance to managing tenant dissatisfaction. A tenant discovering an inoperable heater in winter isn't just an inconvenience; it's a habitability issue that requires immediate, and often costly, resolution. Confirming utility functionality beforehand reduces emergency work orders, improves the tenant move-in experience, and minimizes the risk of negative online reviews that can impact your entire portfolio's reputation and increase days on market.
Actionable Tips for Property Managers
To prevent move-in day disasters and streamline operations, property managers should integrate a standardized utility verification process into their leasing and turnover procedures.
- Implement a "Pre-Move-In Utility Audit": Create a standardized checklist for your team to complete 48-72 hours before a new lease starts. This should include testing every light switch, running all faucets to check pressure and temperature, and confirming appliances like the stove and HVAC system power on correctly.
- Provide a Utility Concierge Contact Sheet: Equip new tenants with a one-page document listing all relevant utility providers for the property, including contact numbers and website links for setting up new service. This empowers tenants and reduces inbound queries to your team.
- Require Proof of Utility Transfer: Make it a mandatory lease clause that tenants must provide confirmation numbers or account details showing utilities have been transferred into their name before keys are handed over. This prevents accidental billing to your company or the owner.
- Document and Photograph Functionality: During the pre-move-in audit, take time-stamped photos or a short video showing that key utilities and appliances are in working order. This provides a clear baseline for the property's condition and can be invaluable in resolving future security deposit disputes.
4. Conduct a Thorough Property Inspection
A thorough property inspection before tenant move-in is a non-negotiable step that documents the asset's condition, prevents future disputes, and upholds your company's standard of quality. For property managers operating at scale, a standardized, detailed inspection process is the bedrock of efficient maintenance operations and security deposit administration. It identifies pre-existing issues, ensuring the incoming tenant is not held responsible for them, and confirms the property is safe and habitable. This systematic review is an essential component of any professional renting a home checklist.
Why This Step is Crucial for Operational Success
Standardizing property inspections provides a clear, documented baseline of the property's condition, which is invaluable during security deposit reconciliation. When you can point to a time-stamped photo of a pristine countertop from the move-in report, it eliminates "he said, she said" arguments over damages at move-out. This proactive documentation drastically reduces the time your team spends on dispute resolution and minimizes potential legal challenges, protecting the owner's investment and streamlining the turn process. Discovering a broken window latch or signs of pests before occupancy also allows for immediate remediation, preventing costly emergency maintenance calls later.
Actionable Tips for Property Managers
To create a scalable and defensible inspection process, property managers should implement a system that leaves no room for ambiguity and ensures consistency across their entire portfolio.
- Utilize a Digital Checklist: Implement a detailed digital inspection template that covers every room and feature, from testing every electrical outlet to checking for water pressure in showers. This ensures no detail is missed.
- Take Comprehensive Photos and Videos: Mandate high-resolution photos and a video walkthrough for every inspection. Photos should capture wide shots of rooms as well as close-ups of appliances, fixtures, and any existing wear and tear.
- Test All Systems and Appliances: Require the inspector to physically test the HVAC system (both heat and cool), run the dishwasher, check all stove burners, and test smoke and carbon monoxide detectors, documenting their operational status. You can discover more about the benefits of professional property walkthroughs and how they protect your assets.
- Create a Shared Report: Ensure both the tenant and the property manager receive a copy of the finalized, signed inspection report with all photos and notes. This shared document becomes the official record of the property's condition at the start of the lease.
5. Request and Review the Move-Out Inspection Checklist
The end of a tenancy is often a source of friction, primarily centered around the security deposit return. The move-out inspection checklist is a proactive tool that sets clear expectations for the property's condition upon vacancy, mitigating potential disputes before they arise. For property managers, providing this document upfront is a strategic move that streamlines the turn process, protects the owner's asset, and standardizes deposit dispositions across a large portfolio. This level of transparency is a vital component of a professional renting a home checklist.
Why This Step is Crucial for Operational Success
Providing a move-out checklist at the beginning of the lease cycle transforms the tenant from a potential adversary into an informed partner in property preservation. When tenants know the specific criteria for a full security deposit refund, such as the requirement for professional carpet cleaning or specific paint touch-up standards, they are more likely to meet those expectations. This significantly reduces the time your team spends coordinating deductions, disputing charges, and managing make-ready vendors, accelerating the unit turn time and minimizing vacancy loss.
Actionable Tips for Property Managers
To leverage the move-out checklist as an operational tool, property managers should integrate it into the lease signing process, not just the move-out procedure. This establishes clear standards from day one.
- Include as a Lease Addendum: Make the move-out inspection checklist a formal part of the lease agreement that the tenant signs. This ensures they have received and acknowledged the requirements.
- Define "Normal Wear and Tear": Provide a brief, written definition or examples of what your company considers "normal wear and tear" versus chargeable damages. For instance, specify that minor scuffs on walls are acceptable, but large holes are not.
- Clarify Cleaning Standards: Be explicit about cleaning expectations. Instead of "clean carpets," specify "carpets must be professionally steam cleaned with a receipt provided." This removes ambiguity and prevents disputes over cleaning quality.
- Send a Reminder Pre-Move-Out: Re-send a digital copy of the checklist to the tenant 30-45 days before their lease ends. This serves as a helpful reminder and prompts them to schedule necessary services, ensuring a smoother transition for your operations team.
6. Verify Landlord and Property Management Information
Establishing clear and verified lines of communication is a non-negotiable step in any professional tenancy. For property managers overseeing large, distributed portfolios, providing tenants with accurate and accessible contact information is fundamental to operational integrity and tenant trust. This step involves ensuring the tenant knows exactly who to contact for routine inquiries, maintenance requests, and emergencies, which is a critical component of a comprehensive renting a home checklist. This clarity prevents confusion, speeds up issue resolution, and protects all parties from miscommunication and potential fraud.
Why This Step is Crucial for Operational Success
When a tenant has verified contact details, it directly impacts your team's efficiency. A clear protocol for communication channels prevents tenants from contacting the wrong person or, worse, being unable to report a critical issue like a burst pipe. This proactive verification minimizes frantic, misdirected calls and ensures that maintenance requests are logged through proper channels, like a tenant portal, allowing for streamlined tracking and dispatch. It also serves as a crucial defense against rental scams, where fraudulent actors pose as legitimate landlords or managers. By providing official, verifiable contact points, you reinforce your company's legitimacy and protect your assets and reputation.
Actionable Tips for Property Managers
To institutionalize this verification process across your portfolio, implement a standardized communication protocol during the onboarding phase.
- Create a "Welcome Packet" with a Contact Sheet: Provide a branded, one-page document listing all essential contacts: the assigned property manager, the main office line, the accounting department for payment questions, and a dedicated 24/7 emergency maintenance number.
- Verify Information in the Lease: Ensure that Section 1 of your lease agreement explicitly lists the legal name of the property management company, the official mailing address (not the property address), and primary contact details.
- Discuss Communication Protocols: During the lease signing or move-in orientation, explain the preferred methods of communication for different issues (e.g., portal for non-urgent maintenance, email for lease questions, phone for emergencies).
- Safeguard Against Fraud: Remind tenants to only correspond through official channels and be wary of any requests for payment or personal information from unverified numbers or email addresses. As rental scams become more sophisticated, this guidance is invaluable. You can learn more about how to combat the growing epidemic of rental scams.
7. Check Insurance and Liability Coverage Requirements
Renters insurance is a non-negotiable safeguard for both tenants and property managers, protecting assets and mitigating liability. For large-scale property management companies, mandating and verifying this coverage is a critical operational checkpoint that minimizes financial risk across the portfolio. A clear insurance requirement, enforced consistently, prevents costly disputes over property damage or personal injury and is an essential component of a comprehensive renting a home checklist.
Why This Step is Crucial for Operational Success
Enforcing a renters insurance mandate is a fundamental risk management strategy. When a tenant’s negligence causes a fire or flood, their liability coverage can cover the repairs, protecting the property owner’s investment and preventing a claim against the owner's policy. This process keeps the owner's insurance premiums stable and reduces the administrative burden on your team to manage and oversee costly restoration projects, ensuring operational continuity.
Actionable Tips for Property Managers
To seamlessly integrate insurance verification into your leasing workflow, develop a clear and automated process that protects your assets without creating friction for new tenants.
- Specify Coverage Minimums in the Lease: Clearly state the required minimum liability coverage (e.g., $100,000) and personal property coverage in the lease agreement. This removes ambiguity and sets clear expectations.
- Require Naming the Property as "Interested Party": Mandate that tenants add the property management company or property owner as an "interested party" or "additional interest" on their policy. This ensures you are automatically notified if the policy is canceled or lapses.
- Automate Proof of Insurance Collection: Utilize property management software to require tenants to upload their insurance declaration page before keys are released. Set automated reminders for policy renewals to ensure continuous coverage.
- Provide Educational Resources: Offer tenants a one-page guide explaining the value of renters insurance, clarifying terms like "liability" vs. "personal property," and recommending reputable providers. This positions you as a helpful resource and speeds up compliance.
8. Establish and Document the Rent Payment Method
A clear and efficient rent collection process is the financial backbone of any property management operation. Establishing and documenting the exact payment method, due date, and associated policies removes ambiguity and significantly reduces the risk of late or missed payments. For property managers overseeing large portfolios, a standardized, automated payment system is a non-negotiable component of operational scalability and financial stability. This clarity is a fundamental part of a successful renting a home checklist.
Why This Step is Crucial for Operational Success
Automating and standardizing rent collection directly impacts your bottom line and operational efficiency. When tenants use a preferred method like an online portal with ACH transfers, it minimizes manual processing, reduces the potential for human error, and ensures a consistent cash flow. Clear documentation of grace periods and late fee structures empowers your team to enforce lease terms uniformly across the portfolio, preventing disputes and saving valuable administrative time that would otherwise be spent on collections.
Actionable Tips for Property Managers
To ensure a seamless rent collection process, property managers should implement a system that is clear for tenants and efficient for their operations teams.
- Mandate Online Portal Enrollment: Make enrollment in your online payment portal a required step during the lease signing process. This ensures every tenant is set up for automated payments from day one.
- Provide a Payment Policy Addendum: Attach a one-page document to the lease that explicitly details acceptable payment methods (e.g., ACH, credit card), the exact due date, the grace period, and the escalating late fee structure.
- Set Up Automated Reminders: Configure your property management software to send automated email and SMS reminders to tenants 3-5 days before the rent is due and on the first day of the grace period. This proactive communication can prevent accidental late payments.
- Maintain Digital Records: Ensure your payment system automatically generates and stores digital receipts for all transactions. This creates an indisputable payment history that is crucial for financial reporting and resolving any potential disputes.
9. Identify and Test Safety and Emergency Systems
Beyond the aesthetics and amenities, a rental property's most fundamental responsibility is to provide a safe living environment. For property managers, ensuring all safety and emergency systems are fully operational before a tenant moves in is a non-negotiable aspect of risk management and legal compliance. Verifying these systems protects residents, safeguards the asset, and reduces liability. This crucial check is an essential part of any thorough renting a home checklist.
Why This Step is Crucial for Operational Success
Proactively managing safety systems significantly lowers the risk of catastrophic events and the associated legal and financial fallout. A tenant who moves into a home with a non-functional smoke detector or a blocked fire exit represents a serious liability. Documenting that all systems were tested and functional at move-in creates a clear record of due diligence, which is invaluable in minimizing disputes and demonstrating operational excellence. This process also streamlines maintenance by catching issues before they become urgent, high-cost emergencies.
Actionable Tips for Property Managers
To systematize safety checks and ensure tenant awareness, property managers should integrate these tasks directly into their turnover and move-in procedures.
- Create a Safety Systems Checklist: Develop a standard move-in form that requires a new tenant to initial next to each tested safety device, such as "Smoke detector in hallway tested and functional" and "Carbon monoxide detector in bedroom tested and functional."
- Provide an Emergency Information Sheet: Supply tenants with a one-page document detailing the locations of fire extinguishers, main water shut-off valves, and circuit breaker panels. Include emergency contact numbers for maintenance and local authorities.
- Test and Document During Turnover: Your maintenance or turnover team should test every smoke and CO detector, check fire extinguisher charge levels, and ensure all emergency exits are clear as a final step before listing the property. Document this with photos and a signed checklist.
- Educate Tenants on Building-Wide Systems: For multi-unit properties, ensure tenants understand building-wide evacuation routes and the function of security features. In today's market, the perceived safety offered by modern apartment building access control systems can be a significant factor in a tenant's decision-making process.
10. Confirm Neighbor and Building Amenities/Rules
Beyond the four walls of the rental unit lies the broader community environment, a factor that significantly impacts tenant satisfaction and retention. For property managers, ensuring a prospective tenant understands the community rules, amenity access, and general neighborhood dynamic is a proactive strategy. This step helps set realistic expectations, reduces the likelihood of future disputes over shared spaces, and fosters a more harmonious living environment for all residents, making it an essential part of any renting a home checklist.
Why This Step is Crucial for Operational Success
A tenant who is well-informed about community norms and rules is far less likely to generate complaints or violate policies. When a tenant knows the pool hours, understands visitor parking regulations, or has been introduced to quiet hours, it prevents common operational headaches like noise complaints or unauthorized use of facilities. This clarity minimizes time spent on mediating neighbor disputes and enforcing community guidelines, freeing up your team to focus on higher-value tasks and improving overall portfolio harmony.
Actionable Tips for Property Managers
To facilitate this crucial step, property managers can integrate community orientation into their leasing and move-in processes, which enhances tenant experience and operational efficiency.
- Create a "Community Welcome Packet": Compile a one-page document detailing key information such as amenity hours (pool, gym), trash and recycling schedules, parking rules, and contact information for the building manager or HOA.
- Facilitate a Comprehensive Amenity Tour: During the move-in inspection or key handover, conduct a brief tour of all common areas. Physically point out the mailroom, laundry facilities, and assigned parking spots to eliminate any confusion.
- Encourage Neighborly Introductions: While respecting privacy, you can suggest the new tenant introduce themselves to their immediate neighbors. This small gesture can prevent future misunderstandings and build a stronger community fabric.
- Provide a Digital FAQ: Host a community rules FAQ on your tenant portal. Include answers to common questions about guest policies, maintenance procedures for common areas, and emergency protocols, making information accessible 24/7.
10-Point Renting Checklist Comparison
Item🔄 Implementation Complexity⚡ Resource Requirements📊 Expected Outcomes💡 Ideal Use Cases⭐ Key AdvantagesReview and Understand the Lease AgreementModerate — lengthy/legal wording; careful reading requiredTime to read; optional attorney reviewClear legal rights/obligations; fewer disputesSigning a new lease; negotiating termsLegal protection; clarified expectationsDocument the Property Condition with Photos and VideoLow — straightforward with a phone; requires organizationSmartphone/camera, timestamps, cloud storageVisual evidence for deposit disputes; baseline conditionMove-in/move-out documentationStrong proof; fast to produceVerify Utilities and Service AccessibilityModerate — testing + coordination with providersTime, provider contacts, possible appointmentsWorking utilities on move-in; fewer service interruptionsPre-move checks; seasonal movesPrevents outages; clarifies billing responsibilityConduct a Thorough Property InspectionHigh — systematic walkthrough; may need prosTime, checklist, possible inspector feesIdentifies safety/maintenance issues before occupancyOlder units; long-term leases; safety concernsDetects hazards early; avoids costly repairs laterRequest and Review the Move-Out Inspection ChecklistLow — administrative review and clarificationTime to request/review; documentationClear end-of-lease standards; fewer surprise chargesLease management; budgeting for move-outPredictable move-out costs; dispute reductionVerify Landlord and Property Management InformationLow — collect and confirm contactsTime, written recordsAccessible contacts for repairs and legal noticesAll tenancies; emergency preparednessFaster response in emergencies; proper notice deliveryCheck Insurance and Liability Coverage RequirementsModerate — select and maintain a policyInsurance premium, time to compare providersProtection for belongings and liability coverageTenants with valuable possessions; required by leaseFinancial protection; compliance with lease termsEstablish and Document the Rent Payment MethodLow — set up method and retain proofBank account/portal access, record-keepingTimely payments and documented payment trailMonthly rent management; dispute preventionAvoids late fees; provides payment evidenceIdentify and Test Safety and Emergency SystemsModerate — testing detectors and exits; may need repairsTime, batteries/tools, requests for fixesFunctional safety systems and known evacuation routesMove-in day; families or health/safety prioritiesLife-safety assurance; legal complianceConfirm Neighbor and Building Amenities/RulesLow — social checks and rule reviewTime to meet neighbors; read building policiesAwareness of community norms and amenity accessShared buildings; amenity-dependent tenantsReduces violations; smoother community living
Scaling Your Leasing Operations for Maximum Portfolio ROI
The journey from a lead to a signed lease is paved with dozens of critical touchpoints, each representing an opportunity for either efficiency or friction. For property managers overseeing hundreds, or even thousands, of distributed units, managing this journey at scale is the defining operational challenge. The comprehensive "renting a home checklist" detailed in this guide isn't just a tool for tenants; it's a strategic framework for standardizing your leasing operations and delivering a consistent, professional experience across your entire portfolio.
By operationalizing each step, you transform the leasing process from a reactive, property-by-property scramble into a proactive, systemized engine for growth. A standardized move-in inspection process, clear documentation protocols, and consistent communication about lease terms all contribute to minimizing disputes, reducing human error, and creating a superior tenant experience that directly impacts renewal rates. This isn't just about making tenants happy; it's about building an operational foundation that protects your assets and your reputation.
From Checklist to Scalable System
Mastering the elements of this checklist provides a clear competitive advantage. When your team can confidently answer every prospective tenant's question, provide all necessary documentation without delay, and execute flawless move-in and move-out procedures, you build trust and accelerate the decision-making process. This directly translates into lower Days on Market (DOM), a critical KPI for any large portfolio.
However, true scalability isn't achieved through manual execution, no matter how well-defined the process. The real leverage comes from integrating technology to automate the most time-consuming and logistically complex parts of the leasing cycle.
A well-documented process ensures consistency. A well-implemented technology stack ensures scale. For enterprise-level property managers, both are non-negotiable for optimizing portfolio ROI and minimizing vacancy loss.
The Financial Impact of Operational Excellence
The transition from a manual, checklist-driven approach to an automated, system-driven one is where exponential gains are realized. Consider the financial implications of speed-to-lease across a large portfolio. For a property manager with 1,000 units renting at an average of $1,800 per month, the daily cost of vacancy is a staggering $60,000. Reducing your average DOM by just five days can recover $300,000 in annual revenue.
This is where automating key checklist components, particularly the viewing and application stages, becomes a powerful financial lever. By implementing on-demand showing technology, you can:
- Drastically Cut DOM: Offer same-day tours to capture high-intent leads before competitors can even respond.
- Optimize Lead-to-Tour Conversion: Remove scheduling friction and convert more qualified leads into physical tours, maximizing your marketing spend.
- Systemize Quality Control: Use standardized tour reports and feedback mechanisms to ensure every property visit meets your brand standards, even without onsite staff.
Ultimately, this renting a home checklist serves as the blueprint for your leasing operations. By understanding the tenant’s journey, you can build a system that not only meets their needs but also drives unprecedented efficiency and profitability for your portfolio. The goal is to move beyond simply filling vacancies to architecting a leasing machine that minimizes revenue loss and maximizes asset performance at scale.
Ready to transform your leasing checklist into a high-performance, automated system? Showdigs provides the on-demand showing technology and leasing software designed to help large-scale property managers cut DOM and streamline operations across distributed portfolios. See how you can systematize your tour scheduling and accelerate your speed-to-lease by exploring Showdigs today.